 Ekani Ella
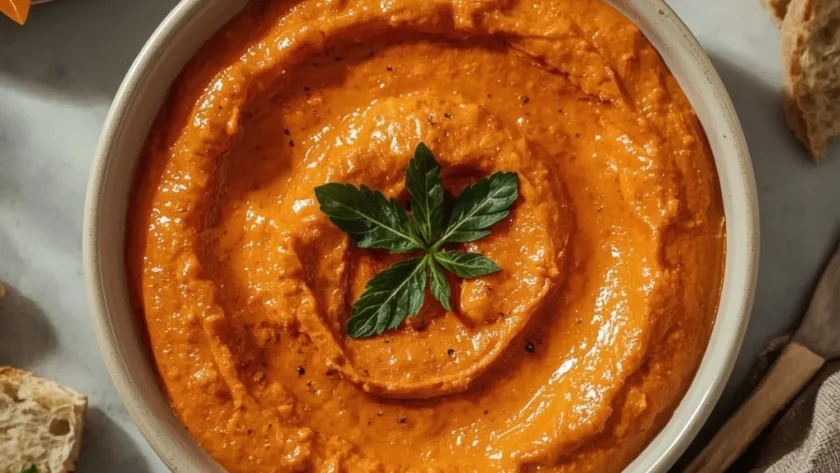
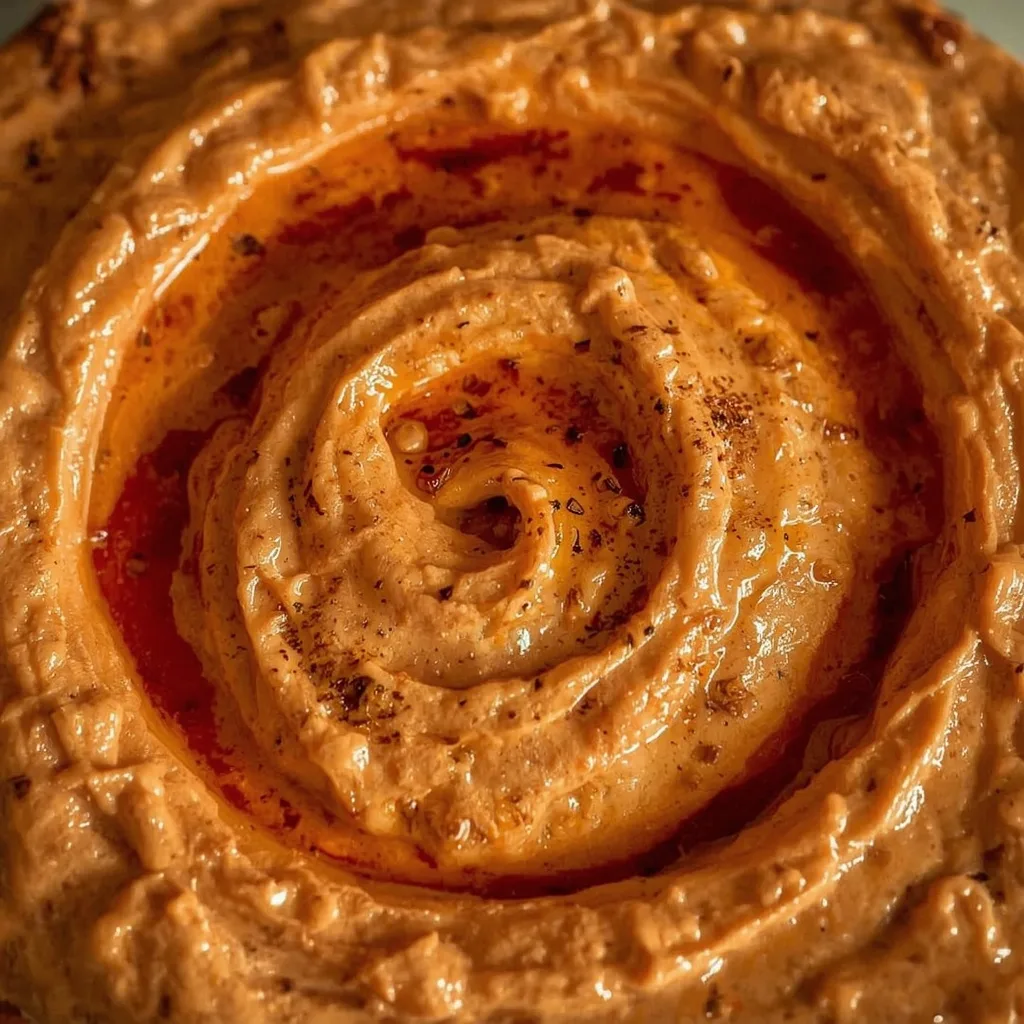
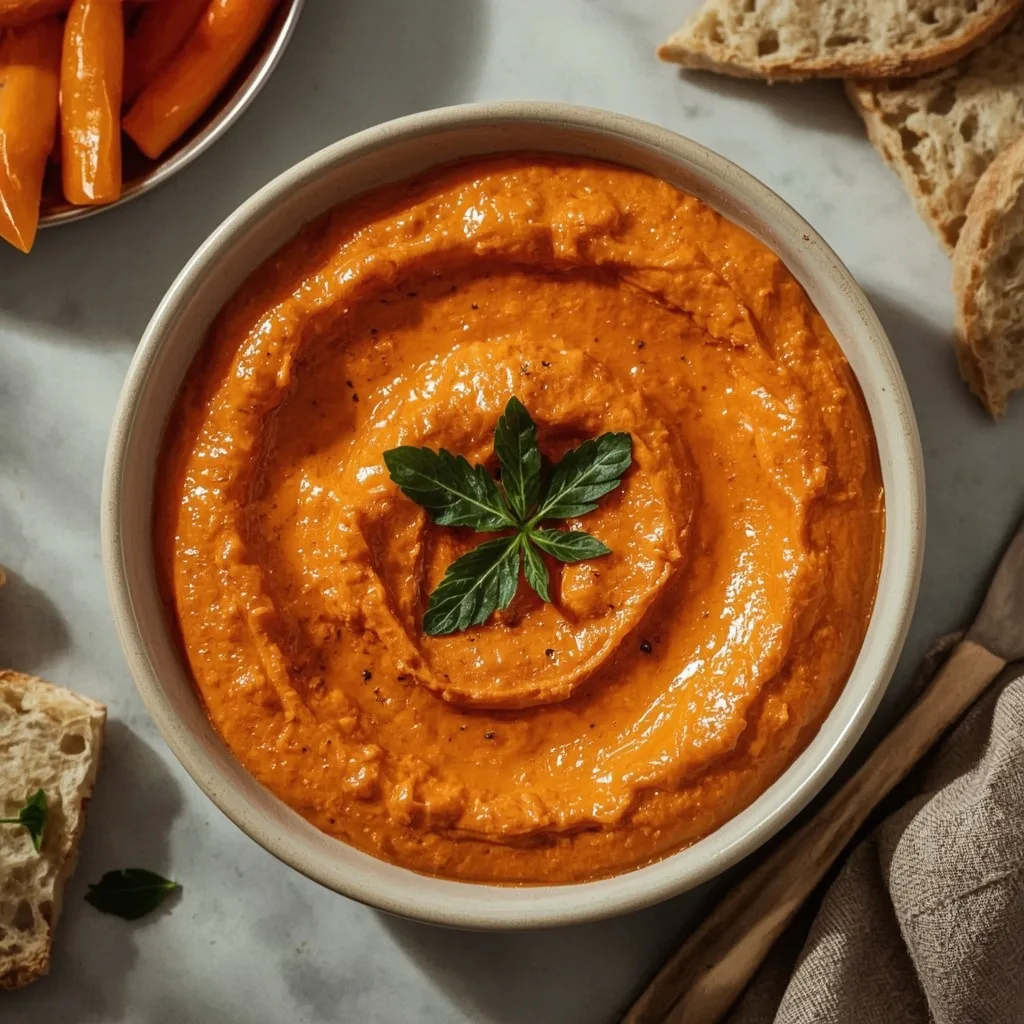
 Mary Berry Roasted Red Pepper Dip is a silky, smoky starter made from charred red bell peppers blended with tangy Greek yogurt and a hint of roasted garlic. This British-style appetizer balances natural sweetness with bright acidity for a creamy finish that works as well on a weeknight as it does for entertaining.
The whole process takes about 40 minutes from start to finish, and I would call this recipe beginner-friendly. The only step that requires a little patience is peeling the blistered skins off the hot peppers — but a quick steam in a covered bowl makes that job surprisingly easy.
What is Mary Berry Roasted Red Pepper Dip?
It is a smooth, velvety dip built from three main components: roasted red bell peppers, full-fat Greek yogurt, and garlic that has been mellowed in the oven. The peppers get blistered at high heat until the skins blacken, then they steam under plastic wrap so the charred layer slips right off. What you are left with is a sweet, smoky purée that tastes far more complex than the short ingredient list suggests. Serve it as a starter with warm pitta bread or crunchy vegetable sticks, and watch it disappear.
Why This Recipe is Worth Trying
- Simple ingredients, big result — Nine everyday items, most of which you probably already have, come together to make something that tastes restaurant-quality.
- No weird techniques — There is nothing fussy here. You roast, you steam, you peel, you blitz. That is the entire method.
- Make-ahead friendly — The dip actually improves after a few hours in the fridge, so you can prepare it a day before your party with zero last-minute stress.
- Healthier than it tastes — At 100 calories per serving with 3g of protein and only 6g of carbohydrates, this dip fits into most eating plans without feeling like a sacrifice.
- Naturally gluten-free and vegetarian — It works for a wide range of dietary needs without requiring any special swaps or substitutions.
Essential Ingredients to Make Mary Berry Roasted Red Pepper Dip
Here is what you need and why each ingredient matters. I have grouped them into categories to keep things organised.
The Peppers and Garlic
- 3 large red bell peppers (about 1½ lb total) — Red peppers are sweeter and riper than green ones, which gives this dip its natural sweetness without added sugar. Look for firm, glossy peppers with no soft spots.
- 2 cloves garlic, unpeeled — Roasting the garlic in its skin transforms sharp, raw allium into a sweet, almost nutty paste that blends seamlessly into the dip. Leave the skins on during roasting; they protect the garlic from burning.
The Oil and Dairy
- 2 tablespoons extra-virgin olive oil, divided — One tablespoon coats the peppers and garlic before roasting. The second tablespoon goes into the food processor to help emulsify the dip and add richness.
- ½ cup full-fat Greek yogurt — Full-fat is non-negotiable here. Low-fat or non-fat yogurts contain more water and will make the dip thin and runny. The fat also carries the smoky flavour better.
The Seasonings and Finish
- 1 tablespoon fresh lemon juice — Acidity balances the sweetness of the roasted peppers and brightens the whole dip. Bottled lemon juice works in a pinch, but fresh tastes noticeably cleaner.
- ½ teaspoon kosher salt — Salt deepens every flavour in the bowl. Start with this amount, taste, and add more only if needed.
- ¼ teaspoon freshly ground black pepper — A small amount adds gentle warmth without overwhelming the pepper flavour.
- ¼ teaspoon smoked paprika (optional, for garnish) — This is entirely optional, but a light dusting reinforces the smoky note from the charred peppers.
- 1 tablespoon fresh parsley, finely chopped (for garnish) — Fresh parsley adds a pop of green colour and a clean, herbaceous finish that cuts through the creaminess.
Handy Kitchen Tools for Best Results
- Baking sheet lined with aluminium foil — The foil catches any sticky juices that drip from the peppers and makes cleanup nearly effortless. Without it, you will be scrubbing caramelised sugar off the pan.
- Tongs — Turning the peppers at the halfway mark is much easier with tongs than with a fork, which can pierce the peppers and release their juices onto the tray.
- Medium bowl with plastic wrap — Covering the hot peppers tightly with plastic wrap traps steam and loosens the skins in about 10 minutes. A lid would work, but wrap creates a tighter seal.
- Food processor with metal blade — A blender can work, but a food processor gives you more control over the texture and is easier to scrape down. You want a thick, spreadable consistency, not a watery purée.
- Rubber spatula — You will need this to scrape down the sides of the food processor at least once to ensure the dip is evenly smooth.
Step-by-Step Guide to Making Mary Berry Roasted Red Pepper Dip
This method follows the recipe exactly as written. I have broken it into clear stages so you can see what comes next without flipping back and forth.
- Preheat and prepare — Heat the oven to 400°F (204°C). Line a baking sheet with foil. Place the whole red bell peppers and the unpeeled garlic cloves on the sheet. Drizzle with 1 tablespoon of olive oil and rub to coat evenly — this prevents sticking and helps the char develop.
- Roast until blistered — Roast for 25–30 minutes, turning the peppers once with tongs halfway through. You want the skins deeply charred in spots and the garlic cloves soft when squeezed. If the peppers need more colour, put them under the broiler for 2–3 minutes, watching closely so they do not burn.
- Steam the peppers — Transfer the hot peppers immediately to a medium bowl and cover tightly with plastic wrap. Let them steam for 10 minutes. Leave the garlic on the baking sheet to cool.
- Make the garlic paste — Squeeze the roasted garlic cloves from their skins into a small bowl. Mash with a fork into a smooth paste. The roasting mellows the sharpness into a sweet, nutty flavour that complements the peppers beautifully.
- Peel and seed — After steaming, rub the blackened skins off the peppers using your fingers or a paper towel. Do not rinse them under water — you will wash away the smoky flavour. Cut each pepper open, remove the stem and seeds, and place the flesh in the food processor bowl.
- Blend until smooth — Add the garlic paste, the remaining 1 tablespoon olive oil, Greek yogurt, lemon juice, kosher salt, and black pepper. Pulse 5–6 times to break down the peppers, then process continuously for 30–40 seconds until completely smooth and creamy. Scrape down the sides once with a spatula.
- Season and adjust — Taste and add more salt or lemon juice if needed. The dip should be bright and slightly tangy. For a smokier flavour, stir in the smoked paprika at this stage. Stop processing as soon as the dip is thick and spreadable — overprocessing makes it loose.
- Chill and serve — Transfer to a serving bowl, cover, and refrigerate for at least 30 minutes to let the flavours meld. Before serving, drizzle with a little olive oil and sprinkle smoked paprika and parsley on top. Serve with pitta chips, crudités, or warm bread.
What I Got Wrong (And How I Fixed It)
- Skipping the steam — The first time I tried peeling the peppers straight out of the oven, the skins stuck and I ended up tearing the flesh. Steaming them under plastic wrap for a full 10 minutes makes the charred skins slide off with almost no effort.
- Using non-fat yogurt — I thought I was being clever by cutting calories. The dip turned out watery and thin, with a sharp, sour taste. Full-fat Greek yogurt gives the right texture and a creamy mouthfeel that low-fat versions cannot match.
- Rinsing the peppers under water — Running the peeled peppers under the tap seems logical for removing stray bits of skin, but it washes away the smoky, charred flavour you worked so hard to create. Rub the skins off with a paper towel instead.
- Overprocessing — I let the food processor run for a full minute because I wanted it extra smooth. The dip became loose and almost foamy. Thirty to forty seconds of continuous processing is plenty. Stop when it is thick and spreadable.
- Serving immediately — The dip tastes noticeably flat when eaten right after blending. The 30-minute chill in the fridge is not optional — it allows the flavours to meld and deepen. Overnight is even better.
- Adding garlic raw — I once skipped the roasting step and added a raw clove to the processor. The sharp, pungent bite overwhelmed the delicate sweetness of the peppers. Roasting the garlic is what makes this dip balanced and approachable.
Healthier Version of Mary Berry Roasted Red Pepper Dip
- Lighten the yogurt — Replace half the full-fat Greek yogurt with a thick, plain skyr or 2% Greek yogurt. The texture stays creamy, and you save around 20 calories and 2g of fat per serving. Do not go lower than 2% or the dip will thin out.
- Reduce the oil — Cut the olive oil from 2 tablespoons to 1 tablespoon total. Use the full tablespoon to coat the peppers before roasting, and skip the drizzle at the end. The dip will be slightly less rich, but the smoky pepper flavour still shines.
- Add extra vegetables — Swap one of the red bell peppers for a roasted yellow or orange pepper. These varieties have similar sugar content but add a broader range of antioxidants. The colour shifts slightly, but the taste remains close.
- Skip the salt garnish — The recipe already includes ½ teaspoon of kosher salt. If you are watching sodium, omit the additional salt in the garnish and rely on the smoked paprika and parsley for flavour. Each serving drops to about 120mg of sodium.
- Boost the protein — Stir in 2 tablespoons of plain, unflavoured protein powder or a spoonful of cottage cheese blended smooth. This adds roughly 4g of extra protein per serving without altering the taste significantly.
Ingredient Substitutions for Mary Berry Roasted Red Pepper Dip
- 3 large red bell peppers → 4 medium jarred roasted red peppers (drained) — Jarred peppers are already peeled and roasted, so you skip the entire oven step. Drain them well and pat dry with paper towels to remove excess brine. The flavour will be slightly less smoky, but the texture is identical.
- ½ cup full-fat Greek yogurt → ½ cup full-fat sour cream — Sour cream has a similar thickness and fat content, though it is tangier and less protein-rich. The dip will be a bit more indulgent in texture. Stir in an extra teaspoon of lemon juice to maintain the brightness.
- 2 cloves garlic → 1 teaspoon garlic powder — In a pinch, garlic powder can replace fresh roasted garlic. Do not use garlic salt, which adds unwanted sodium. The flavour will be milder and less complex, but it works in a hurry.
- 1 tablespoon fresh lemon juice → 1 tablespoon white wine vinegar — White wine vinegar has a similar acidity level and a clean finish. Red wine vinegar is too aggressive here. Apple cider vinegar can substitute, though it adds a faint fruity note.
- ¼ teaspoon smoked paprika → ¼ teaspoon regular paprika plus a drop of liquid smoke — Regular paprika lacks the smoky depth, so a tiny drop of liquid smoke (about ⅛ teaspoon) bridges the gap. Stir it in at the end and taste before adding more — liquid smoke is potent.
- 1 tablespoon fresh parsley → 1 tablespoon fresh basil or chives — Basil adds a slightly sweet, aromatic note that pairs well with roasted peppers. Chives bring a mild onion flavour. Both work beautifully as a garnish.
Pairing Ideas: What to Serve With Mary Berry Roasted Red Pepper Dip
This dip is versatile enough to sit alongside all sorts of dippers, drinks, and side dishes. Here are the combinations I keep coming back to.
- Warm pitta bread — Toast or grill fresh pitta until it puffs and charred spots appear, then tear it into rough pieces. The soft, chewy texture contrasts perfectly with the smooth dip.
- Crudités platter — Arrange cucumber sticks, carrot batons, sugar snap peas, and radish wedges around the bowl. The crunch cleanses your palate between bites and keeps the whole starter feeling light.
- Grilled halloumi — Slice halloumi into ½-inch slabs and sear in a dry pan until golden on both sides. The salty, squeaky cheese is a fantastic counterpoint to the sweet, smoky dip.
- Toasted sourdough crostini — Thin slices of sourdough brushed with olive oil and baked at 375°F (190°C) for 8 minutes become sturdy enough to scoop up generous amounts of dip without breaking.
- Spiced roasted chickpeas — Toss canned chickpeas with cumin, smoked paprika, and a little oil, then roast at 400°F (204°C) for 20 minutes until crispy. They add protein and a pleasing crunch.
- Chilled rosé or a crisp lager — A dry rosé with bright fruit notes mirrors the sweetness of the peppers, while a light lager cuts through the yogurt’s richness. Both drinks keep the appetiser course refreshing.
Expert Tips to Make Perfect Mary Berry Roasted Red Pepper Dip
- Char the peppers thoroughly — Pale, barely blistered peppers yield a dip that tastes more like raw bell pepper than smoky roasted pepper. Do not pull them from the oven until the skins are deeply blackened in patches. If needed, a few minutes under the broiler finishes the job.
- Let the steam do the work — Covering the hot peppers tightly with plastic wrap traps steam that loosens the skins from the flesh. Ten minutes is non-negotiable. Peeling too early tears the flesh and leaves stubborn bits of skin behind.
- Dry the peeled peppers — After peeling, blot the pepper flesh gently with a paper towel. Excess moisture dilutes the dip and makes it thinner. A quick pat before they go into the food processor keeps the texture thick and spreadable.
- Taste before you chill — Flavours dull slightly when cold, so season the dip a little more aggressively than you think you need. If it tastes perfectly seasoned at room temperature, it will taste just right after 30 minutes in the fridge.
- Do not skip the rest — The 30-minute chill is not about temperature alone. It gives the garlic, lemon, and yogurt time to meld with the peppers. Serving the dip straight from the processor tastes noticeably one-dimensional by comparison.
- Bring it to room temperature before serving — Cold dip from the fridge muffles the smoky, sweet flavours. Let it sit on the counter for 15–20 minutes before you put out the bowl. The texture also softens slightly, making it easier to scoop.
- Reserve a spoonful of the roasting oil — Before you toss the foil-lined baking sheet, drizzle any leftover oil from the roasted peppers over the finished dip. That extra hit of pepper-infused oil adds depth and a glossy finish.
Creative Ways to Customize Mary Berry Roasted Red Pepper Dip
- Spicy harissa swirl — Stir 1 to 2 teaspoons of harissa paste into the finished dip before chilling, then swirl a little more on top just before serving. The North African chilli paste adds heat and a complex, peppery warmth that complements the roasted peppers.
- Roasted tomato addition — Add two medium Roma tomatoes to the baking sheet alongside the peppers. Roast, peel, and blend them in with the other ingredients. The tomatoes introduce a gentle acidity and deepen the red colour without overwhelming the pepper flavour.
- Herb oil drizzle — Blitz a handful of fresh basil or mint with 3 tablespoons of olive oil and a pinch of salt, then drizzle over the dip before serving. The herb oil adds a vibrant green contrast and a fresh, aromatic lift.
- Nutty twist with tahini — Replace 2 tablespoons of the Greek yogurt with 2 tablespoons of well-stirred tahini. The sesame paste adds a nutty, slightly bitter edge that balances the sweetness of the peppers. Thin with a teaspoon of water if the dip becomes too thick.
- Smoky chipotle kick — Add 1 teaspoon of chipotle peppers in adobo sauce (minced) to the food processor. The chipotle brings a deep, smoky heat that amplifies the charred flavour of the peppers. Start with less and taste — a little goes a long way.
- Creamy avocado blend — Add half a ripe avocado to the food processor with the other ingredients. The avocado makes the dip even creamier and adds healthy fats. Serve the same day, as the avocado will discolour overnight.
Storing Mary Berry Roasted Red Pepper Dip the Right Way
- Refrigerator in an airtight container — Transfer the dip to a container with a tight-fitting lid and press a piece of plastic wrap directly onto the surface before sealing. This prevents a skin from forming and keeps the dip fresh for up to 4 days.
- Freezer for long-term storage — Spoon the dip into a freezer-safe container, leaving about ½ inch of headroom for expansion. Seal tightly and freeze for up to 3 months. Thaw overnight in the refrigerator, then stir vigorously to bring back the smooth texture.
- Portion into small jars — Divide the dip into 4-ounce jars if you plan to use it in stages. Smaller portions thaw faster and reduce the risk of repeatedly opening and closing a large container, which can introduce bacteria.
- Layer of oil on top — If you are storing the dip for more than 2 days, drizzle a thin layer of olive oil over the surface before sealing. The oil acts as a barrier against air and helps preserve the bright red colour.
- Do not freeze with yogurt-based garnish — If you have already added the parsley and smoked paprika garnish, remove the dip from the freezer bag or container and scrape off the garnish before thawing. Frozen herbs turn limp and watery, and the paprika can become bitter.
How to Reheat Mary Berry Roasted Red Pepper Dip (If Needed)
- Stovetop on low heat — Transfer the dip to a small saucepan and warm over low heat, stirring occasionally, until just heated through. Do not let it boil — high heat causes the yogurt to curdle and separate. This takes about 3–4 minutes.
- Microwave in short bursts — Spoon the dip into a microwave-safe bowl and heat on medium power (50%) in 20-second intervals, stirring between each burst. Two to three intervals are usually enough. Stop as soon as it is warm; overheated yogurt turns grainy.
- Room temperature serve — For the best flavour, skip reheating altogether. Remove the dip from the fridge 30 minutes before serving and let it come to room temperature. The texture stays creamy and the smoky notes are more pronounced than when the dip is warm.
Nutritional Breakdown (per serving)
Based on 1 serving out of 4 total portions.
- Calories: 100
- Protein: 3g
- Fat: 7g
- Carbohydrates: 6g
- Fiber: about 2g
- Sugar: about 3g
- Sodium: around 145mg
FAQs
Can I make Mary Berry Roasted Red Pepper Dip ahead of time?
Yes, and I actually recommend it. The dip needs at least 30 minutes in the fridge to let the flavours meld, but you can make it up to 4 days in advance. Store it in an airtight container and give it a good stir before serving.
How long does Mary Berry Roasted Red Pepper Dip last in the fridge?
It stays fresh for up to 4 days when stored properly in an airtight container. Press a layer of plastic wrap directly onto the surface before sealing to prevent a skin from forming. After 4 days, the texture starts to thin and the flavour fades.
Can I freeze this dip?
Yes, it freezes well for up to 3 months. Thaw it overnight in the refrigerator, then stir vigorously to bring back the smooth texture. If the dip seems slightly watery after thawing, stir in a teaspoon of Greek yogurt to restore the consistency.
What if my dip turns out too thin?
This usually happens when the peppers were not dried after peeling, or when low-fat yogurt was used. To fix it, transfer the dip to a fine-mesh sieve lined with cheesecloth and let it drain over a bowl for 15–20 minutes. You can also blend in a tablespoon of Greek yogurt to thicken it.
Can I use jarred roasted peppers instead of fresh?
Absolutely. Use 4 medium jarred roasted red peppers, drained well and patted dry. The flavour will be less intense and smoky than fresh-roasted peppers, but the texture and overall result are still very good. Reduce the salt slightly since jarred peppers are often packed in brine.
Is this dip spicy?
No, the base recipe is not spicy at all. The smoked paprika garnish adds a mild, earthy warmth rather than heat. If you want a spicy version, stir in 1 teaspoon of chipotle in adobo or a pinch of cayenne pepper when you blend the ingredients.
Try These Recipes
Wrapping It Up
This Mary Berry Roasted Red Pepper Dip has become my go-to starter for almost any occasion, from casual weeknight snacking to festive gatherings. The method is straightforward, the ingredients are easy to find, and the finished dip tastes far more impressive than the effort it requires. Give it a try — I think you will find yourself making it on repeat.
PrintMary Berry Roasted Red Pepper Dip
A silky, smoky dip made from charred red bell peppers blended with tangy Greek yogurt and a hint of garlic. Perfect as a starter with crudités or warm pitta bread, this British-style appetizer balances sweetness and acidity with a creamy finish.
- Prep Time: 10
- Cook Time: 30
- Total Time: 40
- Yield: 4 1x
- Category: Snack
- Method: Roasting
- Cuisine: British
Ingredients
- 3 large red bell peppers (about 1 1/2 lb total)
- 2 cloves garlic, unpeeled
- 2 tablespoons extra-virgin olive oil, divided
- 1/2 cup full-fat Greek yogurt
- 1 tablespoon fresh lemon juice
- 1/2 teaspoon kosher salt
- 1/4 teaspoon freshly ground black pepper
- 1/4 teaspoon smoked paprika (optional, for garnish)
- 1 tablespoon fresh parsley, finely chopped (for garnish)
Instructions
- Preheat the oven to 400°F (204°C). Line a baking sheet with aluminum foil for easy cleanup. Place the whole red bell peppers and the unpeeled garlic cloves on the sheet. Drizzle with 1 tablespoon of the olive oil and rub to coat evenly — this prevents sticking and aids even charring.
- Roast the peppers and garlic for 25–30 minutes, turning the peppers once with tongs at the halfway mark, until the pepper skins are blistered and deeply charred in spots, and the garlic cloves are soft when squeezed gently. If the peppers aren’t sufficiently charred, place them directly under a broiler for 2–3 minutes, watching carefully to avoid burning.
- Remove the baking sheet from the oven. Immediately transfer the hot peppers to a medium bowl and cover tightly with plastic wrap — this traps steam and makes the skins easy to peel. Let the peppers steam for 10 minutes. Allow the garlic to cool on the sheet until cool enough to handle.
- While the peppers steam, squeeze the roasted garlic cloves from their skins into a small bowl. Mash with a fork into a smooth paste. Set aside — the roasting mellows the garlic’s sharpness into a sweet, nutty flavor that complements the peppers.
- After steaming, peel the blackened skins off the peppers. Use your fingers or a paper towel to rub off the charred bits; do not rinse under water as it washes away flavor. Cut each pepper open, remove the stem and seeds, and place the flesh in the bowl of a food processor fitted with the metal blade.
- Add the roasted garlic paste, the remaining 1 tablespoon olive oil, Greek yogurt, lemon juice, kosher salt, and black pepper to the food processor. Pulse 5–6 times to break down the peppers, then process continuously for 30–40 seconds until the dip is completely smooth and creamy. Scrape down the sides once with a spatula to ensure even consistency.
- Taste and adjust seasoning: add more salt or lemon juice if needed — the dip should be bright and slightly tangy. For a smokier flavor, stir in the smoked paprika at this stage. Avoid overprocessing, which can make the dip loose; stop when it is thick and spreadable.
- Transfer the dip to a serving bowl. Cover and refrigerate for at least 30 minutes to allow flavors to meld — this step is essential for depth. Before serving, drizzle with a little olive oil, sprinkle the smoked paprika and parsley over the top, and serve with pitta chips, crudités, or warm bread.
Notes
Store the dip in an airtight container in the refrigerator for up to 4 days. It can be frozen for up to 3 months; thaw overnight in the fridge, then stir well before serving. To reheat (if desired warm), place in a small saucepan over low heat, stirring occasionally, until just warmed through — do not boil or the yogurt may curdle. Serve at room temperature for best flavor.
Nutrition
- Calories: 100
- Sugar: 3g
- Sodium: 145mg
- Unsaturated Fat: 1g
- Carbohydrates: 6g
- Fiber: 2g
- Protein: 3g
- Cholesterol: 0mg
Keywords: roasted red pepper dip, Mary Berry dip, British appetizer, creamy pepper dip, smoky pepper spread, easy snack, party dip, vegetarian appetizer, roasted red pepper yogurt dip, homemade dip