Blog

  • Mary Berry Chicken Casserole

    Mary Berry Chicken Casserole

    Mary Berry Chicken Casserole is a comforting one-pot dish that combines tender chicken pieces with vegetables, herbs, and a rich, savoury sauce. It’s the perfect recipe for family dinners, Sunday lunches, or when you want something hearty yet simple. With its slow-cooked depth of flavour and melt-in-the-mouth chicken, this casserole captures the essence of homely British cooking. Plus, it’s a versatile dish that can be made ahead, making it ideal for busy schedules or entertaining.

    What is Mary Berry Chicken Casserole?

    Mary Berry’s Chicken Casserole is a classic slow-cooked dish made with chicken thighs or drumsticks simmered with onions, carrots, celery, stock, and herbs until the chicken is tender and infused with flavour. Sometimes enriched with white wine or cream, it’s a rustic yet elegant dish that’s easy to prepare and satisfying to eat.

    Mary Berry’s Chicken Casserole

    Try Other Mary Berry Recipes

    Why This Recipe is Worth Trying

    • Comfort in a pot – Hearty and warming for cold evenings.
    • One-pan cooking – Easy preparation and minimal washing up.
    • Family-friendly – Mild flavours that suit all ages.
    • Make-ahead friendly – Tastes even better the next day.
    • Versatile – Can be adapted with extra vegetables or different seasonings.

    Essential Ingredients to Make Mary Berry Chicken Casserole

    • 8 chicken thighs (skin-on, bone-in for extra flavour)
    • 2 tbsp olive oil
    • 2 onions, finely chopped
    • 2 carrots, sliced
    • 2 celery sticks, sliced
    • 2 garlic cloves, minced
    • 1 tbsp plain flour
    • 250ml white wine (optional)
    • 500ml chicken stock
    • 2 bay leaves
    • 1 tsp dried thyme or 2 sprigs fresh thyme
    • 150ml double cream or crème fraîche (optional, for richness)
    • Salt and black pepper, to taste
    • Fresh parsley, chopped, for garnish

    Handy Kitchen Tools for Best Results

    • Heavy-based casserole dish or Dutch oven
    • Wooden spoon
    • Sharp knife and chopping board
    • Measuring jug
    • Ladle for serving

    Step-by-Step Guide to Making Mary Berry Chicken Casserole

    Step 1: Brown the chicken

    Heat oil in a large casserole dish. Add chicken thighs, skin-side down, and cook until golden brown. Remove and set aside.

    Step 2: Cook vegetables

    In the same dish, sauté onions, carrots, celery, and garlic until softened.

    Step 3: Thicken the base

    Stir in flour and cook for 1 minute, then gradually add white wine (if using) and chicken stock. Stir until smooth.

    Step 4: Add flavourings

    Add bay leaves, thyme, and season well with salt and pepper. Return chicken to the dish.

    Step 5: Simmer gently

    Cover with a lid and cook over low heat for 45 minutes to 1 hour, or until chicken is tender and cooked through.

    Step 6: Enrich the sauce (optional)

    Stir in cream or crème fraîche at the end for a rich, velvety sauce.

    Step 7: Garnish and serve

    Scatter with parsley and serve hot with mashed potatoes, rice, or crusty bread.

    What I Got Wrong (And How I Fixed It)

    • Didn’t brown chicken enough – Made the dish look pale. Browning properly added colour and flavour.
    • Added cream too early – Caused curdling. Adding at the end kept the sauce silky.
    • Forgot to reduce liquid – Left sauce too thin. Simmering longer gave the right consistency.

    Healthier Ways to Make Mary Berry Chicken Casserole

    • Use skinless chicken thighs to reduce fat.
    • Replace cream with low-fat crème fraîche or Greek yogurt.
    • Add more vegetables such as courgettes, peas, or green beans.
    • Reduce oil by browning chicken in a non-stick pan.

    Ingredient Substitutions for Mary Berry Chicken Casserole

    • Chicken thighs → Drumsticks or breast meat (though thighs stay juicier).
    • White wine → Extra stock or apple juice for sweetness.
    • Cream → Omit or use coconut milk for a dairy-free option.
    • Thyme → Swap with rosemary or oregano.

    Pairing Ideas: What to Serve With Chicken Casserole

    • Mashed potatoes – Perfect for soaking up the sauce.
    • Steamed green beans – Fresh and light.
    • Buttered crusty bread – Rustic and hearty.
    • Rice or couscous – A lighter option for serving.
    • Roasted root vegetables – Complements the slow-cooked flavour.

    Expert Tips for Chicken Casserole Success

    • Brown chicken properly – Builds depth of flavour.
    • Simmer gently, not vigorously – Keeps chicken tender.
    • Taste as you go – Adjust seasoning to balance flavours.
    • Add cream at the end – Prevents curdling.
    • Make ahead – Flavours deepen if left overnight.
    • Use bone-in thighs – For maximum flavour and juiciness.

    Creative Ways to Customize Chicken Casserole

    • Add mushrooms for earthiness.
    • Stir in peas at the end for colour.
    • Add a dash of mustard for sharpness.
    • Use cider instead of wine for a fruity twist.
    • Sprinkle with grated cheese before serving for richness.

    Storing Chicken Casserole the Right Way

    • Refrigerate cooled casserole for up to 3 days.
    • Freeze portions for up to 2 months.
    • Store in airtight containers to lock in freshness.

    How to Reheat Chicken Casserole

    • Stovetop method – Heat gently in a saucepan until piping hot.
    • Oven method – Reheat covered at 180°C for 20 minutes.
    • Microwave method – Reheat portions for 3–4 minutes, stirring halfway.
    • From frozen – Thaw overnight before reheating.

    Nutritional Breakdown (per serving)

    • Calories: ~450 kcal
    • Protein: 35g
    • Carbohydrates: 18g
    • Fat: 25g
    • Fibre: 3g
    • Sodium: 620mg
    Print

    Mary Berry’s Chicken Casserole

    Mary Berry’s Chicken Casserole is a classic slow-cooked dish made with chicken thighs or drumsticks simmered with onions, carrots, celery, stock, and herbs until the chicken is tender and infused with flavour. Sometimes enriched with white wine or cream, it’s a rustic yet elegant dish that’s easy to prepare and satisfying to eat.

    • Author: Ekani Ella
    • Prep Time: 25
    • Cook Time: 55
    • Total Time: 1 hour 20 minutes
    • Yield: 6 1x
    • Category: Main Course
    • Method: Simmering
    • Cuisine: British

    Ingredients

    Scale

    • 8 chicken thighs (skin-on, bone-in for extra flavour)
    • 2 tbsp olive oil
    • 2 onions, finely chopped
    • 2 carrots, sliced
    • 2 celery sticks, sliced
    • 2 garlic cloves, minced
    • 1 tbsp plain flour
    • 250ml white wine (optional)
    • 500ml chicken stock
    • 2 bay leaves
    • 1 tsp dried thyme or 2 sprigs fresh thyme
    • 150ml double cream or crème fraîche (optional, for richness)
    • Salt and black pepper, to taste
    • Fresh parsley, chopped, for garnish

    Instructions

    Step 1: Brown the chicken

    Heat oil in a large casserole dish. Add chicken thighs, skin-side down, and cook until golden brown. Remove and set aside.

    Step 2: Cook vegetables

    In the same dish, sauté onions, carrots, celery, and garlic until softened.

    Step 3: Thicken the base

    Stir in flour and cook for 1 minute, then gradually add white wine (if using) and chicken stock. Stir until smooth.

    Step 4: Add flavourings

    Add bay leaves, thyme, and season well with salt and pepper. Return chicken to the dish.

    Step 5: Simmer gently

    Cover with a lid and cook over low heat for 45 minutes to 1 hour, or until chicken is tender and cooked through.

    Step 6: Enrich the sauce (optional)

    Stir in cream or crème fraîche at the end for a rich, velvety sauce.

    Step 7: Garnish and serve


    Scatter with parsley and serve hot with mashed potatoes, rice, or crusty bread.

    Did you make this recipe?

    Share a photo and tag us — we can’t wait to see what you’ve made!

    FAQs

    How do you make chicken casserole more flavorful?

    To make chicken casserole more flavorful, brown the chicken well before simmering, use fresh herbs like thyme or rosemary, and add a splash of white wine or mustard to deepen the sauce.

    Should you cook chicken before putting it in a casserole?

    Yes, chicken should be browned before adding to a casserole. This not only locks in flavour but also improves the texture and colour of the finished dish.

    Can you prepare chicken casserole in advance?

    Yes, chicken casserole can be prepared a day ahead. Store it in the fridge, then reheat gently on the stovetop or in the oven before serving. The flavours often improve overnight.

    How do you thicken the sauce in a chicken casserole?

    You can thicken the sauce by stirring flour into the vegetables before adding stock or by letting the casserole simmer uncovered until reduced.

    Wrapping It Up

    Mary Berry’s Chicken Casserole is a classic, wholesome dish that proves comfort food doesn’t have to be complicated. With its tender chicken, hearty vegetables, and rich sauce, it’s a recipe that works for family dinners, entertaining, or meal prepping ahead of time. Once you try this version, it’s bound to become a regular in your cooking rotation.

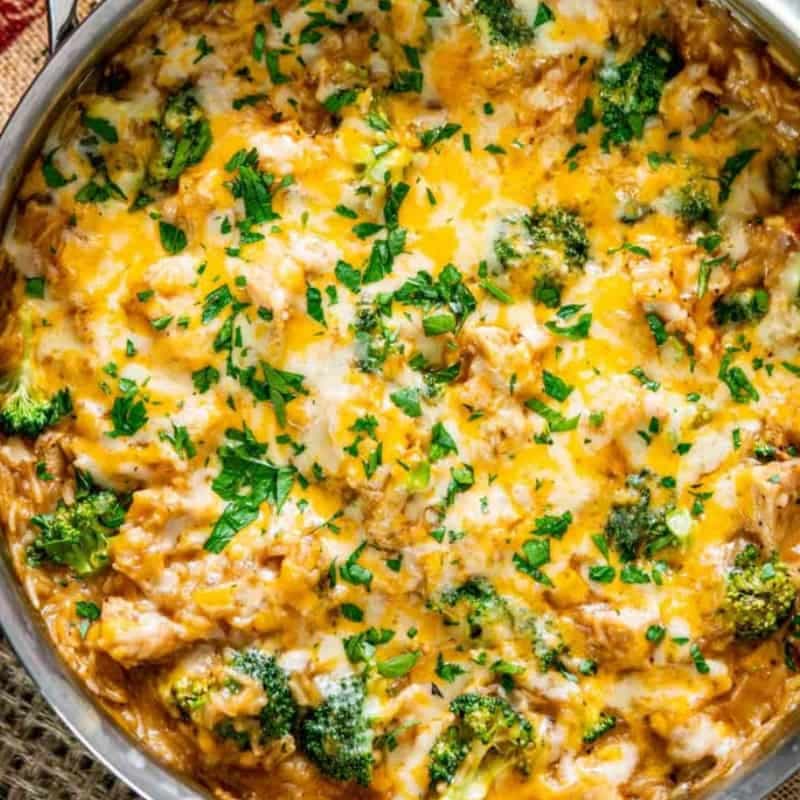
  • Mary Berry Chicken and Broccoli Bake Recipe

    Mary Berry Chicken and Broccoli Bake Recipe

    Mary Berry’s Chicken and Broccoli Bake is the perfect comfort food dish, combining tender chicken pieces, fresh broccoli, and a creamy cheese sauce baked under a golden topping. It’s hearty yet simple, making it ideal for family dinners, weeknight meals, or when you need a satisfying dish that’s easy to put together. With minimal fuss and maximum flavour, this bake captures Mary Berry’s classic approach to homely, delicious cooking.

    What is Mary Berry Chicken and Broccoli Bake?

    Mary Berry’s Chicken and Broccoli Bake is a creamy casserole-style dish made with cooked chicken and lightly blanched broccoli, coated in a rich cheese sauce, and finished with breadcrumbs or grated cheese for a crispy topping. It’s a versatile, family-friendly recipe that balances nutrition with indulgence, offering both protein and vegetables in one dish.

    Mary Berry Chicken and Broccoli Bake

    Try Other Mary Berry Recipes

    Why This Recipe is Worth Trying

    • Comforting and hearty – A complete meal in one dish.
    • Family-friendly – Loved by kids and adults alike.
    • Make-ahead option – Assemble and chill before baking.
    • Versatile – Works with leftover chicken or turkey.
    • Golden topping – Crispy and cheesy for extra flavour.

    Essential Ingredients to Make Mary Berry Chicken and Broccoli Bake

    • 500g cooked chicken breast or thighs, shredded
    • 300g broccoli florets
    • 50g butter
    • 50g plain flour
    • 500ml milk
    • 150ml double cream (optional, for richness)
    • 1 tsp Dijon mustard
    • 150g mature cheddar cheese, grated
    • 50g breadcrumbs
    • 2 tbsp fresh parsley, chopped
    • Salt and black pepper, to taste

    Handy Kitchen Tools for Best Results

    • Large saucepan for sauce
    • Baking dish
    • Balloon whisk
    • Steamer or pan for broccoli
    • Mixing bowls

    Step-by-Step Guide to Making Mary Berry Chicken and Broccoli Bake

    Step 1: Cook the broccoli

    Lightly steam or boil broccoli florets for 2–3 minutes until just tender. Drain and set aside.

    Step 2: Make the cheese sauce

    In a saucepan, melt butter, stir in flour, and cook for 1 minute. Gradually whisk in milk until smooth. Simmer until thickened, then stir in cream, mustard, and half the grated cheese. Season with salt and pepper.

    Step 3: Combine filling

    In a large bowl, mix the shredded chicken, cooked broccoli, and cheese sauce until evenly coated.

    Step 4: Assemble the bake

    Transfer mixture to a greased baking dish. Top with remaining cheese, breadcrumbs, and parsley for a crisp finish.

    Step 5: Bake until golden

    Bake in a preheated oven at 200°C (180°C fan) for 20–25 minutes until bubbling and golden brown on top.

    Step 6: Serve hot

    Serve straight from the oven with a green salad, rice, or crusty bread.

    Mary Berry Chicken and Broccoli Bake

    What I Got Wrong (And How I Fixed It)

    • Overcooked broccoli – Made it mushy. Blanching lightly kept it firm.
    • Added sauce too thin – Resulted in watery bake. Simmering longer gave the right thickness.
    • Skipped breadcrumbs – Topping lacked crunch. Adding both cheese and breadcrumbs gave the best texture.

    Healthier Ways to Make Mary Berry Chicken and Broccoli Bake

    • Use skimmed milk instead of cream for a lighter sauce.
    • Swap cheddar for reduced-fat cheese.
    • Add extra vegetables such as cauliflower or spinach.
    • Replace butter with olive oil for the sauce base.

    Ingredient Substitutions for Mary Berry Chicken and Broccoli Bake

    • Chicken → Turkey, ham, or even rotisserie chicken.
    • Broccoli → Cauliflower florets or green beans.
    • Dijon mustard → Wholegrain mustard or omit for a milder taste.
    • Breadcrumbs → Crushed crackers or panko for extra crunch.

    Pairing Ideas: What to Serve With Chicken and Broccoli Bake

    • Buttery mashed potatoes – Creamy and hearty.
    • Steamed carrots – Adds sweetness to balance the dish.
    • Crisp garden salad – A refreshing side.
    • Rice or couscous – Makes the bake more filling.
    • Garlic bread – Perfect for scooping up the creamy sauce.

    Expert Tips for Chicken and Broccoli Bake Success

    • Blanch broccoli briefly – Keeps colour vibrant and texture firm.
    • Whisk sauce continuously – Prevents lumps.
    • Season sauce well – Cheese adds flavour, but salt and pepper balance it.
    • Use fresh breadcrumbs – They toast evenly for a golden crust.
    • Cool slightly before serving – Sauce thickens as it rests.
    • Assemble ahead – Bake on the day for convenience.

    Creative Ways to Customize Chicken and Broccoli Bake

    • Add crispy bacon pieces for extra flavour.
    • Mix in mushrooms or leeks for richness.
    • Stir in pasta to make it a complete pasta bake.
    • Use blue cheese for a stronger taste.
    • Sprinkle with toasted nuts for crunch.

    Storing Chicken and Broccoli Bake the Right Way

    • Refrigerate cooled leftovers for up to 3 days.
    • Freeze unbaked dough for up to 1 month. Bake straight from frozen, adding 10 minutes.
    • Store in an airtight container to keep the flavour fresh.

    How to Reheat Chicken and Broccoli Bake

    • Oven method – Reheat at 180°C for 20 minutes until piping hot.
    • Microwave method – Heat individual portions for 3–4 minutes.
    • From frozen – Bake covered at 180°C for 45–50 minutes until hot.

    Nutritional Breakdown (per serving)

    • Calories: ~480 kcal
    • Protein: 34g
    • Carbohydrates: 22g
    • Fat: 28g
    • Fibre: 4g
    • Sodium: 570mg
    Print

    Mary Berry Chicken and Broccoli Bake Recipe

    Mary Berry’s Chicken and Broccoli Bake is a creamy casserole-style dish made with cooked chicken and lightly blanched broccoli, coated in a rich cheese sauce, and finished with breadcrumbs or grated cheese for a crispy topping. It’s a versatile, family-friendly recipe that balances nutrition with indulgence, offering both protein and vegetables in one dish.

    • Author: Ekani Ella
    • Prep Time: 25
    • Cook Time: 25
    • Total Time: 50 minutes
    • Yield: 6 1x
    • Category: Main Course
    • Method: Baking
    • Cuisine: American

    Ingredients

    Scale

      • 500g cooked chicken breast or thighs, shredded

      • 300g broccoli florets

      • 50g butter

      • 50g plain flour

      • 500ml milk

      • 150ml double cream (optional, for richness)

      • 1 tsp Dijon mustard

      • 150g mature cheddar cheese, grated

      • 50g breadcrumbs

      • 2 tbsp fresh parsley, chopped

      • Salt and black pepper, to taste

    Instructions

    Step 1: Cook the broccoli

    Lightly steam or boil broccoli florets for 2–3 minutes until just tender. Drain and set aside.

    Step 2: Make the cheese sauce

    In a saucepan, melt butter, stir in flour, and cook for 1 minute. Gradually whisk in milk until smooth. Simmer until thickened, then stir in cream, mustard, and half the grated cheese. Season with salt and pepper.

    Step 3: Combine filling

    In a large bowl, mix the shredded chicken, cooked broccoli, and cheese sauce until evenly coated.

    Step 4: Assemble the bake

    Transfer mixture to a greased baking dish. Top with remaining cheese, breadcrumbs, and parsley for a crisp finish.

    Step 5: Bake until golden

    Bake in a preheated oven at 200°C (180°C fan) for 20–25 minutes until bubbling and golden brown on top.

    Step 6: Serve hot


    Serve straight from the oven with a green salad, rice, or crusty bread.

    Did you make this recipe?

    Share a photo and tag us — we can’t wait to see what you’ve made!

    FAQs

    Should broccoli be cooked before adding it to the chicken and broccoli bake?

    Yes, broccoli should be lightly blanched or steamed before adding. This keeps it tender but still firm after baking, preventing it from turning mushy.

    How do you stop chicken and broccoli bake from being watery?

    To avoid a watery bake, make sure the cheese sauce is thickened before mixing with the chicken and broccoli. Also, drain the broccoli well after blanching to remove excess moisture.

    Can I use raw chicken in a chicken and broccoli bake?

    It’s best to use pre-cooked chicken for this bake. Raw chicken would release liquid during baking, making the dish watery and unevenly cooked.

    How do you get a crispy topping on chicken and broccoli bake?

    For a crispy topping, combine grated cheese with fresh breadcrumbs and sprinkle over the bake before putting it in the oven. Bake until golden and bubbling.

    Wrapping It Up

    Mary Berry’s Chicken and Broccoli Bake is a warm, satisfying dish that’s both practical and delicious. With its creamy sauce, tender chicken, and golden topping, it’s a recipe that brings comfort to the table while remaining simple to prepare. Ideal for families or gatherings, this bake is a classic you’ll want to make again and again.

  • Mary Berry Make Ahead Roast Potatoes

    Mary Berry Make Ahead Roast Potatoes

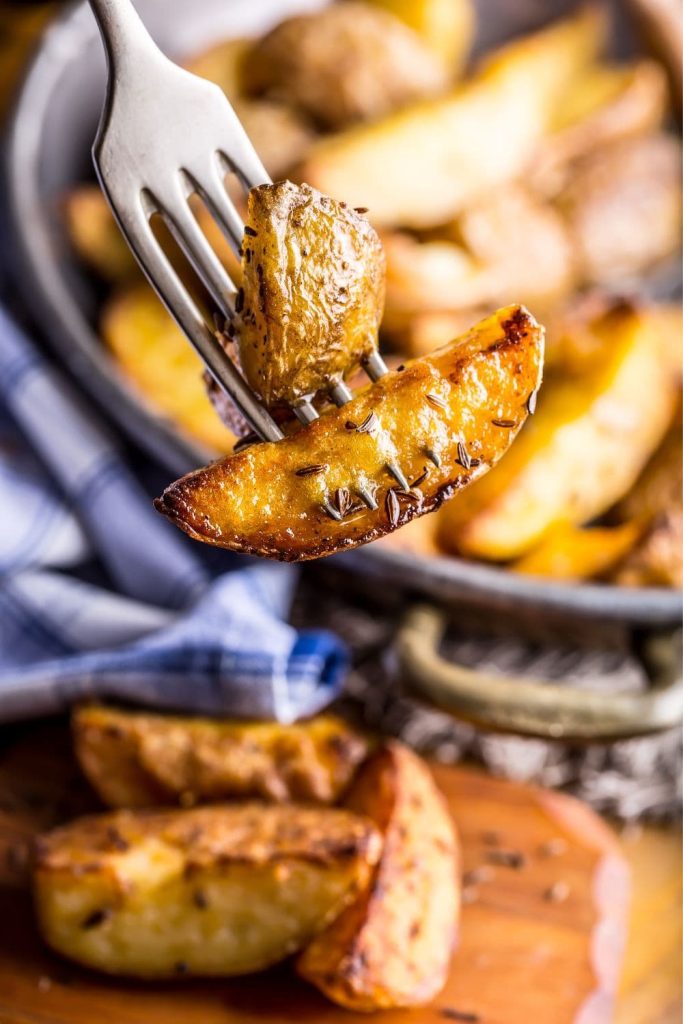
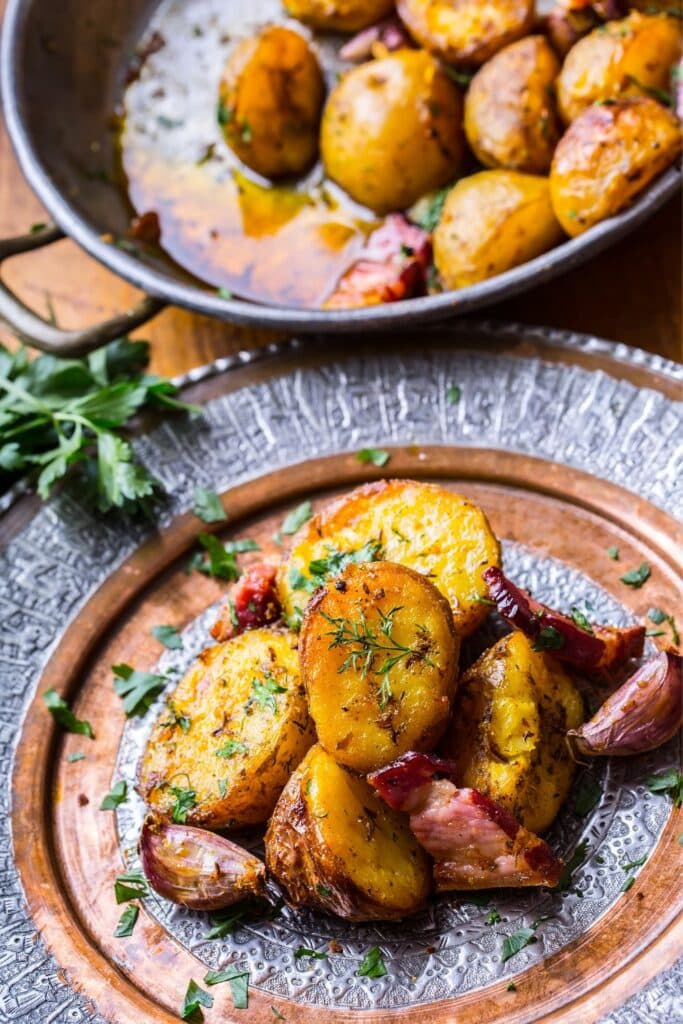
    Mary Berry’s Make Ahead Roast Potatoes are the perfect solution for busy cooks who want crispy, golden potatoes without the last-minute stress. This method allows you to prepare the potatoes in advance—parboil, drain, and coat them in oil—then simply finish roasting when you’re ready to serve. Ideal for Christmas dinner, Sunday roasts, or large gatherings, these potatoes save time while still delivering the fluffy centres and crunchy edges everyone loves.

    What are Mary Berry’s Make Ahead Roast Potatoes?

    These are traditional British-style roast potatoes that can be partially prepared in advance. The potatoes are peeled, cut, parboiled, and roughed up before being coated in hot oil. At this stage, they can be chilled or frozen until needed. On the day of serving, they are roasted in a hot oven until crisp and golden, giving you more freedom to focus on the rest of the meal.

    Mary Berry Make Ahead Roast Potatoes

    Try Other Mary Berry Recipes

    Why This Recipe is Worth Trying

    • Time-saving – Prep a day ahead to reduce cooking stress.
    • Crispy and fluffy – Still delivers the classic roast potato texture.
    • Perfect for entertaining – Ideal for feeding a crowd.
    • Flexible storage – Can be chilled or frozen until needed.
    • No compromise on taste – Just as delicious as freshly made.

    Essential Ingredients to Make Mary Berry Make Ahead Roast Potatoes

    • 1.5kg floury potatoes (Maris Piper or King Edward)
    • 4 tbsp vegetable oil, goose fat, or duck fat
    • 2 tsp sea salt
    • 1 tsp black pepper
    • Fresh rosemary or thyme sprigs (optional)

    Handy Kitchen Tools for Best Results

    • Large saucepan
    • Colander
    • Roasting tray
    • Sharp knife and peeler
    • Wooden spoon or spatula

    Step-by-Step Guide to Making Mary Berry Make Ahead Roast Potatoes

    Step 1: Prepare the potatoes

    Peel and cut potatoes into even chunks. Place them in cold salted water.

    Step 2: Parboil the potatoes

    Bring to a boil and simmer for 8–10 minutes until the edges soften slightly.

    Step 3: Drain and rough up

    Drain in a colander and shake gently to roughen the edges, helping them crisp later.

    Step 4: Coat with oil or fat

    Toss the potatoes with hot oil, goose fat, or duck fat until evenly coated.

    Step 5: Store until needed

    • For chilling: Arrange on a tray, cover, and refrigerate up to 24 hours.
    • For freezing: Freeze on a tray, then transfer to a freezer bag once solid.

    Step 6: Roast until golden

    When ready to cook, roast at 200°C (180°C fan) for 40–45 minutes, turning halfway, until crisp and golden.

    Mary Berry Make Ahead Roast Potatoes

    What I Got Wrong (And How I Fixed It)

    • Didn’t rough up edges – Potatoes were smooth, not crispy. Shaking them fixed this.
    • Crowded tray – Led to steaming instead of roasting. Using two trays solved it.
    • Forgot to preheat oil – Caused sticking. Heating oil until sizzling prevented it.

    Healthier Ways to Make Mary Berry Make Ahead Roast Potatoes

    • Roast in olive oil instead of goose fat.
    • Use smaller chunks for less oil absorption.
    • Season with herbs and garlic for flavour without extra salt.
    • Swap with sweet potatoes for a lighter option.

    Ingredient Substitutions for Mary Berry Make Ahead Roast Potatoes

    • Maris Piper → King Edward or Russet potatoes.
    • Goose fat → Sunflower or rapeseed oil.
    • Fresh rosemary → Thyme, sage, or oregano.
    • Sea salt → Garlic salt for added flavour.

    Pairing Ideas: What to Serve With Make Ahead Roast Potatoes

    • Traditional roast beef with gravy – A classic British pairing.
    • Roast chicken and vegetables – Perfect for Sunday lunch.
    • Vegetarian nut roast – A hearty, meat-free option.
    • Christmas turkey with trimmings – A festive must-have.
    • Slow-roast lamb with mint sauce – Rich and satisfying.

    Expert Tips for Roast Potato Success

    • Always preheat oil – Ensures crisp outsides from the start.
    • Don’t overcrowd the tray – Space is key for even roasting.
    • Freeze on a tray first – Stops potatoes from sticking together.
    • Turn halfway through roasting – Gives even colour and crispness.
    • Serve immediately – Best enjoyed fresh from the oven.
    • Add herbs at the end – Prevents burning and keeps flavours bright.

    Creative Ways to Customize Make Ahead Roast Potatoes

    • Toss with parmesan and garlic after roasting.
    • Add paprika or cayenne pepper for spice.
    • Drizzle with truffle oil before serving.
    • Mix in roasted garlic cloves for depth.
    • Sprinkle with lemon zest and parsley for freshness.

    Storing Make Ahead Roast Potatoes the Right Way

    • Refrigerate prepped potatoes for up to 24 hours before roasting.
    • Freeze for up to 1 month after parboiling and oiling.
    • Store cooked leftovers in the fridge for up to 3 days.

    How to Reheat Make Ahead Roast Potatoes

    • Oven method – Reheat at 200°C for 15 minutes until crisp.
    • Air fryer method – 8–10 minutes at 180°C works well.
    • Microwave method – Softens potatoes, best for quick reheating.
    • From frozen – Roast directly in a hot oven for 50–55 minutes.

    Nutritional Breakdown (per serving)

    • Calories: ~265 kcal
    • Protein: 5g
    • Carbohydrates: 47g
    • Fat: 8g
    • Fibre: 5g
    • Sodium: 420mg

    FAQs

    Can roast potatoes be prepared the day before?

    Yes, roast potatoes can be prepared a day ahead by peeling, parboiling, and coating them in oil. Store them in the fridge, then roast in a hot oven just before serving to make them crispy.

    How do you keep make ahead roast potatoes crispy?

    To keep roast potatoes crispy, roast them at a high temperature and avoid covering them once cooked. Reheating in a hot oven instead of the microwave also helps restore their crunch.

    Can you freeze parboiled potatoes for roasting later?

    Yes, parboiled potatoes can be frozen. Spread them on a tray until solid, then transfer to a freezer bag. Roast straight from frozen, adding extra time until golden and crisp.

    Should potatoes be cooled before freezing for roast potatoes?

    Potatoes should be cooled completely before freezing to prevent excess ice crystals. Cooling also helps maintain their texture when roasted later.

    Wrapping It Up

    Mary Berry’s Make Ahead Roast Potatoes are the perfect way to enjoy crisp, golden potatoes without the last-minute stress. With their fluffy interiors and crunchy exteriors, they’re a guaranteed crowd-pleaser for any roast dinner, whether it’s a Sunday family meal or a holiday feast. Once you try this method, you’ll never go back to rushed roast potatoes again.

    Print

    Mary Berry Make Ahead Roast Potatoes

    These are traditional British-style roast potatoes that can be partially prepared in advance. The potatoes are peeled, cut, parboiled, and roughed up before being coated in hot oil. At this stage, they can be chilled or frozen until needed. On the day of serving, they are roasted in a hot oven until crisp and golden, giving you more freedom to focus on the rest of the meal.

    • Author: Ekani Ella
    • Prep Time: 15
    • Cook Time: 45
    • Total Time: 1 hour
    • Yield: 6 1x
    • Category: Side Dish
    • Method: Baking
    • Cuisine: British

    Ingredients

    Scale

    • 1.5kg floury potatoes (Maris Piper or King Edward)

    • 4 tbsp vegetable oil, goose fat, or duck fat

    • 2 tsp sea salt

    • 1 tsp black pepper

    • Fresh rosemary or thyme sprigs (optional)

    Instructions

    Step 1: Prepare the potatoes

    Peel and cut potatoes into even chunks. Place them in cold salted water.

    Step 2: Parboil the potatoes

    Bring to a boil and simmer for 8–10 minutes until the edges soften slightly.

    Step 3: Drain and rough up

    Drain in a colander and shake gently to roughen the edges, helping them crisp later.

    Step 4: Coat with oil or fat

    Toss the potatoes with hot oil, goose fat, or duck fat until evenly coated.

    Step 5: Store until needed

    • For chilling: Arrange on a tray, cover, and refrigerate up to 24 hours.

    • For freezing: Freeze on a tray, then transfer to a freezer bag once solid.

    Step 6: Roast until golden

    When ready to cook, roast at 200°C (180°C fan) for 40–45 minutes, turning halfway, until crisp and golden.

    Did you make this recipe?

    Share a photo and tag us — we can’t wait to see what you’ve made!

  • Mary Berry Roast Potatoes with Semolina Recipe

    Mary Berry Roast Potatoes with Semolina Recipe

    Mary Berry’s Roast Potatoes with Semolina are the ultimate crispy potatoes that steal the show at any Sunday roast or festive dinner. The trick lies in parboiling the potatoes first, roughing them up, then dusting them with semolina before roasting in hot oil or fat. The semolina coating creates an irresistible crunch while the insides stay fluffy and soft. This recipe is simple but guarantees perfect golden potatoes every time.

    What are Mary Berry Roast Potatoes with Semolina?

    These are classic British roast potatoes taken up a notch with a coating of fine semolina. After parboiling, the potatoes are drained, shaken to roughen their edges, then tossed in semolina before roasting. This extra step makes the exterior extra crisp, creating the perfect contrast with the fluffy centre. Mary Berry’s method has become a go-to for home cooks who want reliable, crunchy potatoes for any special occasion.

    Mary Berry Roast Potatoes with Semolina
    Mary Berry Roast Potatoes with Semolina

    Try Other Mary Berry Recipes

    Why This Recipe is Worth Trying

    • Extra crispy texture – Semolina gives a crunch that flour alone can’t match.
    • Simple and budget-friendly – Only a few ingredients needed.
    • Perfect side dish – Works with roast meats, poultry, or vegetarian mains.
    • Make-ahead friendly – Parboil and coat in advance, then roast when needed.
    • Foolproof method – A trusted Mary Berry technique.

    Essential Ingredients to Make Mary Berry Roast Potatoes with Semolina

    • 1.5kg floury potatoes (Maris Piper or King Edward)
    • 4 tbsp vegetable oil, goose fat, or duck fat
    • 2 tbsp semolina
    • 2 tsp sea salt
    • 1 tsp black pepper
    • 2–3 sprigs fresh rosemary or thyme (optional)

    Handy Kitchen Tools for Best Results

    • Large saucepan
    • Colander
    • Roasting tray
    • Measuring spoons
    • Wooden spoon or spatula

    Step-by-Step Guide to Making Mary Berry Roast Potatoes with Semolina

    Step 1: Prepare the potatoes

    Peel and cut potatoes into even-sized chunks. Place in a saucepan of salted cold water.

    Step 2: Parboil the potatoes

    Bring to a boil and simmer for 8–10 minutes until the edges soften but the centres remain firm.

    Step 3: Drain and rough up

    Drain well, then shake in the colander to fluff up the edges. This rough texture helps the semolina stick.

    Step 4: Coat with semolina

    Sprinkle semolina over the potatoes and toss until each piece is lightly coated.

    Step 5: Heat oil in tray

    Place oil or fat into a roasting tray and preheat in the oven at 200°C (180°C fan) until sizzling hot.

    Step 6: Roast until crisp

    Add potatoes carefully to the hot fat, turn to coat, and roast for 40–45 minutes, turning halfway, until golden and crunchy.

    Step 7: Season and serve

    Sprinkle with sea salt and herbs before serving immediately.

    Mary Berry Roast Potatoes with Semolina

    What I Got Wrong (And How I Fixed It)

    • Didn’t heat oil enough – Potatoes stuck to the tray. Heating the oil until it sizzles solved it.
    • Used too much semolina – Made them heavy. A light dusting gave perfect crunch.
    • Crowded tray – Prevented crisping. Using two trays ensured even roasting.

    Healthier Ways to Make Mary Berry Roast Potatoes with Semolina

    • Roast with olive oil instead of animal fat.
    • Reduce oil slightly and roast at high heat for crispiness.
    • Add garlic cloves and herbs for flavour without extra salt.
    • Use smaller potato chunks to cut roasting time.

    Ingredient Substitutions for Mary Berry Roast Potatoes with Semolina

    • Semolina → Use fine polenta or cornmeal for a similar crunch.
    • Goose fat → Swap with sunflower or rapeseed oil.
    • Maris Piper potatoes → Russets or King Edwards work well too.
    • Fresh herbs → Try sage, thyme, or oregano.

    Pairing Ideas: What to Serve With Semolina Roast Potatoes

    • Roast chicken with gravy – A classic pairing.
    • Slow-roast lamb – Crispy potatoes balance the richness.
    • Vegetarian nut roast – A hearty meat-free main.
    • Beef Wellington – Elegant and indulgent with crunchy sides.
    • Christmas turkey dinner – A must-have festive side.

    Expert Tips for Roast Potato Success

    • Floury potatoes only – They give the best fluffy centre.
    • Shake after boiling – Creates edges for crunch.
    • Heat oil until sizzling – Ensures crisp exteriors.
    • Turn halfway – Gives even colour and texture.
    • Serve straight from the oven – Best enjoyed fresh and hot.
    • Add herbs at the end – Prevents burning.

    Creative Ways to Customize Roast Potatoes with Semolina

    • Toss with parmesan cheese after roasting for extra flavour.
    • Sprinkle with paprika or cayenne pepper for a spicy twist.
    • Drizzle with truffle oil before serving.
    • Add roasted onion wedges or garlic cloves to the tray.
    • Mix in lemon zest and parsley before serving for freshness.

    Storing Roast Potatoes the Right Way

    • Store leftovers in an airtight container in the fridge for up to 3 days.
    • Freeze cooked roast potatoes for up to 1 month.
    • Re-crisp in the oven before serving.

    How to Reheat Roast Potatoes with Semolina

    • Oven method – Reheat at 200°C for 15 minutes until crisp.
    • Air fryer method – 8–10 minutes at 180°C.
    • Microwave method – Softens potatoes, but quick for reheating.
    • From frozen – Roast directly from frozen, adding 10 minutes to cooking time.

    Nutritional Breakdown (per serving)

    • Calories: ~270 kcal
    • Protein: 5g
    • Carbohydrates: 48g
    • Fat: 9g
    • Fibre: 5g
    • Sodium: 420mg

    FAQs

    Why do you put semolina on roast potatoes?

    Semolina helps create an extra crispy coating on roast potatoes. After parboiling, the rough edges catch the semolina, which toasts in the oven, giving a golden, crunchy texture.

    Should you add semolina before or after roasting potatoes?

    Semolina should be added after parboiling and draining the potatoes, just before roasting. Tossing them in semolina at this stage ensures the coating sticks and crisps up in the oven.

    Can I use polenta instead of semolina for roast potatoes?

    Yes, fine polenta or cornmeal can be used instead of semolina. Both create a similar crunchy coating, though semolina gives a slightly lighter texture.

    How do you stop roast potatoes with semolina from sticking to the tray?

    To prevent sticking, preheat the oil in the roasting tray until very hot before adding the potatoes. This immediate sizzle helps form a crust and stops them from sticking.

    Wrapping It Up

    Mary Berry’s Roast Potatoes with Semolina are the secret to achieving the crispiest, most golden potatoes every time. With just a handful of ingredients and a simple technique, these potatoes make the perfect accompaniment to any roast dinner. Once you try them, they’ll become your go-to recipe for holidays, celebrations, and family meals.

    Print

    Mary Berry Roast Potatoes with Semolina Recipe

    These are classic British roast potatoes taken up a notch with a coating of fine semolina. After parboiling, the potatoes are drained, shaken to roughen their edges, then tossed in semolina before roasting. This extra step makes the exterior extra crisp, creating the perfect contrast with the fluffy centre. Mary Berry’s method has become a go-to for home cooks who want reliable, crunchy potatoes for any special occasion.

    • Author: Ekani Ella
    • Prep Time: 15
    • Cook Time: 45
    • Total Time: 1 hour
    • Yield: 6 1x
    • Category: Side Dish
    • Method: Baking
    • Cuisine: British

    Ingredients

    Scale
    • 1.5kg floury potatoes (Maris Piper or King Edward)

    • 4 tbsp vegetable oil, goose fat, or duck fat

    • 2 tbsp semolina

    • 2 tsp sea salt

    • 1 tsp black pepper

    • 23 sprigs fresh rosemary or thyme (optional)

    Instructions

    Step 1: Prepare the potatoes

    Peel and cut potatoes into even-sized chunks. Place in a saucepan of salted cold water.

    Step 2: Parboil the potatoes

    Bring to a boil and simmer for 8–10 minutes until the edges soften but the centres remain firm.

    Step 3: Drain and rough up

    Drain well, then shake in the colander to fluff up the edges. This rough texture helps the semolina stick.

    Step 4: Coat with semolina

    Sprinkle semolina over the potatoes and toss until each piece is lightly coated.

    Step 5: Heat oil in the tray

    Place oil or fat into a roasting tray and preheat in the oven at 200°C (180°C fan) until sizzling hot.

    Step 6: Roast until crisp

    Add potatoes carefully to the hot fat, turn to coat, and roast for 40–45 minutes, turning halfway, until golden and crunchy.

    Step 7: Season and serve

    Sprinkle with sea salt and herbs before serving immediately.

    Did you make this recipe?

    Share a photo and tag us — we can’t wait to see what you’ve made!

  • Mary Berry Twice Cooked Roast Potatoes Recipe

    Mary Berry Twice Cooked Roast Potatoes Recipe

    Mary Berry’s Twice Cooked Roast Potatoes are the ultimate side dish—crispy on the outside, fluffy inside, and full of rich flavour. Unlike regular roast potatoes, this version involves parboiling the potatoes first before roasting them, giving them extra crunch and golden edges. Perfect for Sunday roasts, festive dinners, or as a comfort side with meat and vegetables, these potatoes will quickly become a family favourite.

    What are Mary Berry’s Twice Cooked Roast Potatoes?

    Twice cooked roast potatoes are made by first parboiling peeled potatoes until tender on the outside but still firm inside. They are then roughed up, tossed in oil or fat, and roasted at a high temperature until crisp and golden. Mary Berry’s method ensures that the outside becomes beautifully crunchy while the inside stays light and fluffy.

    Mary Berry Twice Cooked Roast Potatoes
    Mary Berry Twice Cooked Roast Potatoes

    Try Other Mary Berry Recipes

    Why This Recipe is Worth Trying

    • Extra crispy results – The two-step cooking process guarantees crunch.
    • Simple ingredients – Just potatoes, oil, and seasoning.
    • Perfect for entertaining – A side dish everyone loves.
    • Works with any roast – Chicken, beef, lamb, or vegetarian mains.
    • Make-ahead friendly – Parboil earlier, then roast when needed.

    Essential Ingredients to Make Mary Berry Twice-Cooked Roast Potatoes

    • 1.5kg Maris Piper or King Edward potatoes
    • 4 tbsp vegetable oil, goose fat, or duck fat
    • 2 tsp sea salt
    • 1 tsp black pepper
    • Fresh rosemary or thyme sprigs (optional)

    Handy Kitchen Tools for Best Results

    • Large saucepan
    • Colander
    • Roasting tray
    • Sharp knife and peeler
    • Wooden spoon for tossing

    Step-by-Step Guide to Making Mary Berry Twice Cooked Roast Potatoes

    Step 1: Prepare the potatoes

    Peel the potatoes and cut them into even-sized chunks.

    Step 2: Parboil until tender

    Place potatoes in salted cold water, bring to a boil, and simmer for 8–10 minutes until the edges are just soft.

    Step 3: Drain and rough up

    Drain well in a colander, then shake gently to roughen the edges. This helps them crisp during roasting.

    Step 4: Heat fat in tray

    Place oil or fat in a roasting tray and heat in a preheated oven at 200°C (180°C fan).

    Step 5: Roast until golden

    Add potatoes carefully to the hot fat, turn to coat, and roast for 40–45 minutes, turning halfway, until golden brown and crisp.

    Step 6: Season and serve

    Sprinkle with sea salt and optional herbs before serving.

    Mary Berry Twice Cooked Roast Potatoes

    What I Got Wrong (And How I Fixed It)

    • Didn’t dry potatoes enough – Left them soggy; shaking in a colander helped.
    • Crowded the tray – Potatoes steamed instead of crisping. Using two trays fixed this.
    • Used the wrong variety – Waxy potatoes stayed firm; floury potatoes gave fluffy centres.

    Healthier Ways to Make Mary Berry Twice Cooked Roast Potatoes

    • Roast with olive oil instead of goose fat.
    • Reduce oil slightly and roast at high heat for crispness without excess fat.
    • Add garlic and herbs for extra flavour instead of salt.
    • Use sweet potatoes for a fibre-rich alternative.

    Ingredient Substitutions for Mary Berry Twice Cooked Roast Potatoes

    • Maris Piper potatoes → Use King Edward or Russets.
    • Goose fat → Swap with sunflower or rapeseed oil.
    • Fresh rosemary → Thyme or sage works beautifully.
    • Sea salt → Try garlic salt or smoked salt for a twist.

    Pairing Ideas: What to Serve With Roast Potatoes

    • Classic roast chicken – A timeless pairing.
    • Beef with gravy – Potatoes soak up rich flavours.
    • Vegetarian nut roast – A hearty meat-free option.
    • Roast lamb with mint sauce – Complements the crispy texture.
    • Holiday turkey dinner – A must-have festive side.

    Expert Tips for Roast Potato Success

    • Preheat the oil well – Ensures instant crisping when potatoes go in.
    • Don’t skip roughing up – Creates more surface for crunch.
    • Turn halfway through – Gives even colour and crispness.
    • Serve straight away – Best enjoyed fresh out of the oven.
    • Avoid overcrowding – Space ensures roasting, not steaming.
    • Use floury potatoes – They crisp best while staying fluffy inside.

    Creative Ways to Customize Roast Potatoes

    • Toss with Parmesan and garlic after roasting.
    • Sprinkle with paprika or chili flakes for spice.
    • Add a drizzle of truffle oil before serving.
    • Roast with onion wedges for sweetness.
    • Mix in whole cloves of roasted garlic for depth.

    Storing Roast Potatoes the Right Way

    • Store cooled potatoes in an airtight container in the fridge for up to 3 days.
    • Freeze cooked roast potatoes on a tray, then transfer to bags for up to 1 month.
    • Re-crisp in the oven before serving.

    How to Reheat Roast Potatoes

    • Oven method – Bake at 200°C for 15 minutes until crisp again.
    • Air fryer method – 8–10 minutes at 180°C works well.
    • Microwave method – Softens potatoes; use only if quick reheating is needed.
    • From frozen – Roast directly from frozen at 200°C for 20–25 minutes.

    Nutritional Breakdown (per serving)

    • Calories: ~260 kcal
    • Protein: 5g
    • Carbohydrates: 46g
    • Fat: 8g
    • Fibre: 4g
    • Sodium: 410mg

    FAQs

    Why are roast potatoes cooked twice?

    Roast potatoes are cooked twice to achieve the best texture. Parboiling softens the outer edges, which become crisp when roasted, while the inside stays fluffy.

    How do you keep roast potatoes crispy after cooking?

    To keep roast potatoes crispy, leave them uncovered after roasting and avoid stacking them. Reheating in a hot oven instead of the microwave also helps maintain crunch.

    What type of potato is best for twice-cooked roast potatoes?

    Floury potatoes like Maris Piper, King Edward, or Russet are best for twice cooked roast potatoes. They crisp well on the outside while staying fluffy inside.

    Should you oil potatoes before or after boiling?

    Potatoes should be oiled after boiling. Tossing them in hot oil or fat after parboiling ensures an even coating and helps create golden, crispy edges during roasting.

    Wrapping It Up

    Mary Berry’s Twice Cooked Roast Potatoes prove that the simplest ingredients often make the best dishes. With a fluffy interior and crisp golden exterior, they are the ultimate side dish for any roast dinner.

    Print

    Mary Berry Twice Cooked Roast Potatoes Recipe

    Twice cooked roast potatoes are made by first parboiling peeled potatoes until tender on the outside but still firm inside. They are then roughed up, tossed in oil or fat, and roasted at a high temperature until crisp and golden. Mary Berry’s method ensures that the outside becomes beautifully crunchy while the inside stays light and fluffy.

    • Author: Ekani Ella
    • Prep Time: 15
    • Cook Time: 45
    • Total Time: 1 hour
    • Yield: 6 1x
    • Category: Side Dish
    • Method: Baking
    • Cuisine: British

    Ingredients

    Scale
    • 1.5kg Maris Piper or King Edward potatoes

    • 4 tbsp vegetable oil, goose fat, or duck fat

    • 2 tsp sea salt

    • 1 tsp black pepper

    • Fresh rosemary or thyme sprigs (optional)

    Instructions

    Step 1: Prepare the potatoes

    Peel the potatoes and cut into even-sized chunks.

    Step 2: Parboil until tender

    Place potatoes in salted cold water, bring to a boil, and simmer for 8–10 minutes until the edges are just soft.

    Step 3: Drain and rough up

    Drain well in a colander, then shake gently to roughen the edges. This helps them crisp during roasting.

    Step 4: Heat fat in tray

    Place oil or fat in a roasting tray and heat in a preheated oven at 200°C (180°C fan).

    Step 5: Roast until golden

    Add potatoes carefully to the hot fat, turn to coat, and roast for 40–45 minutes, turning halfway, until golden brown and crisp.

    Step 6: Season and serve

    Sprinkle with sea salt and optional herbs before serving.

    Did you make this recipe?

    Share a photo and tag us — we can’t wait to see what you’ve made!

  • Mary Berry Apple and Almond Cake Recipe

    Mary Berry Apple and Almond Cake Recipe

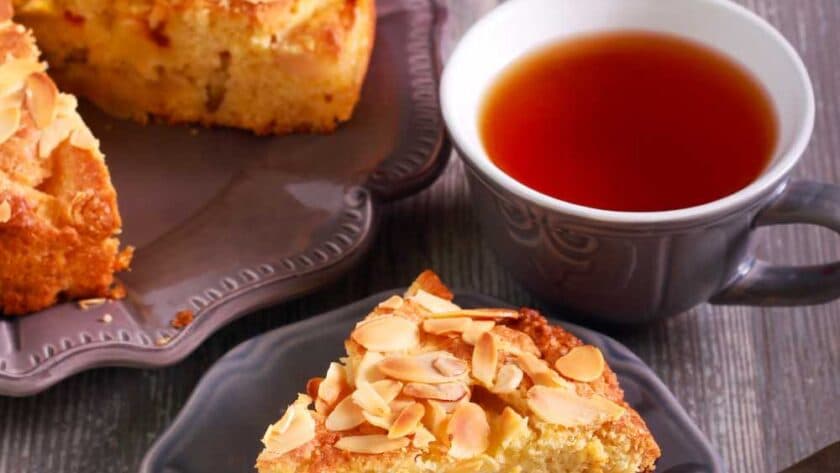
    Mary Berry’s Apple and Almond Cake is a moist, buttery cake that perfectly balances the natural sweetness of apples with the nutty richness of ground almonds. This delightful dessert is soft, tender, and has a lovely crunch from the almond topping. It’s an excellent choice for afternoon tea, weekend baking, or even as a dinner party dessert served with cream or custard. Best of all, this cake is straightforward to prepare, yet it looks and tastes special enough to impress guests.

    What is Mary Berry’s Apple and Almond Cake?

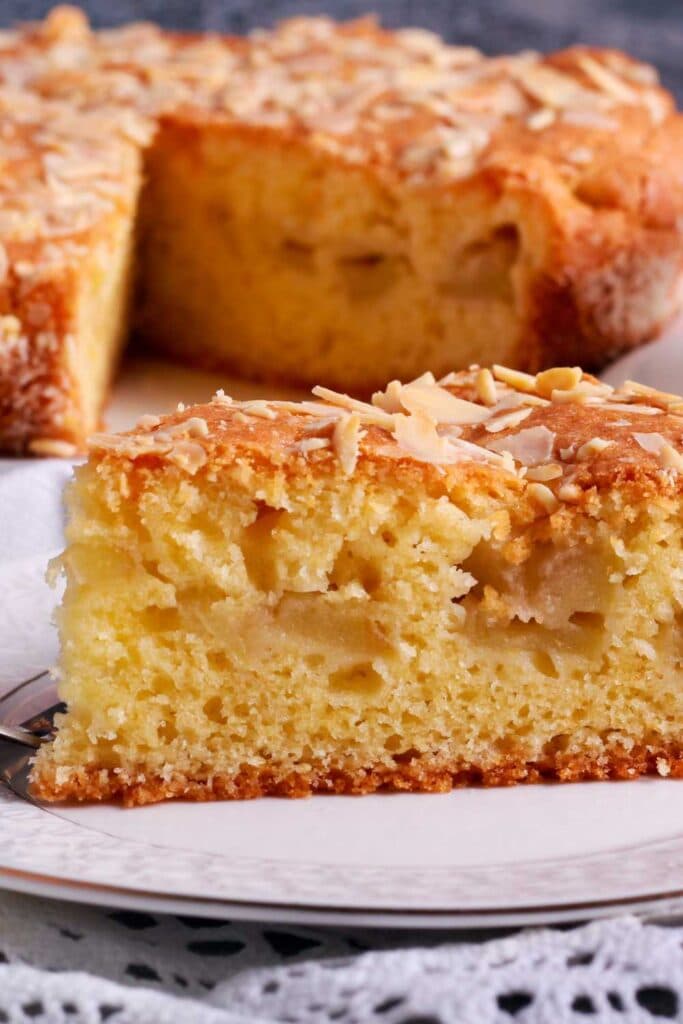
    Mary Berry’s Apple and Almond Cake is a classic British bake made with a simple sponge base enriched with ground almonds, topped with slices of apple and a scattering of flaked almonds. As it bakes, the apples soften into the sponge, keeping it moist, while the almonds on top become lightly toasted, adding texture and flavour. It’s a timeless cake that highlights the beauty of seasonal fruit in a homely yet elegant way.

    Mary Berry Apple and Almond Cake

    Try Other Mary Berry Recipes

    Why This Recipe is Worth Trying

    • Moist and flavourful – Ground almonds keep the cake soft and rich.
    • Seasonal and versatile – Works with eating apples or cooking apples.
    • Perfect for any occasion – Afternoon tea, dessert, or a weekend treat.
    • Simple to prepare – Straightforward method, no complicated steps.
    • Beautiful presentation – Golden cake topped with apples and almonds.

    Essential Ingredients to Make Mary Berry Apple and Almond Cake

    • 150g butter, softened
    • 150g caster sugar
    • 2 large eggs
    • 100g self-raising flour
    • 1 tsp baking powder
    • 100g ground almonds
    • 2 medium apples, peeled, cored, and thinly sliced
    • 50g flaked almonds
    • 1 tsp vanilla extract
    • 2 tbsp milk
    • Icing sugar, for dusting

    Handy Kitchen Tools for Best Results

    • 20cm round cake tin (lined with baking paper)
    • Mixing bowls
    • Electric whisk or hand whisk
    • Spatula
    • Sharp knife and peeler
    • Cooling rack

    Step-by-Step Guide to Making Mary Berry Apple and Almond Cake

    Step 1: Prepare the tin

    Preheat the oven to 180°C (160°C fan). Grease and line a 20cm round cake tin with baking paper.

    Step 2: Cream butter and sugar

    In a large bowl, beat butter and sugar together until pale and fluffy.

    Step 3: Add eggs and flavouring

    Whisk in eggs one at a time, followed by vanilla extract. If the mixture curdles, add a spoonful of flour.

    Step 4: Fold in dry ingredients

    Sift in flour and baking powder, then fold through ground almonds. Add milk to loosen the mixture into a smooth batter.

    Step 5: Assemble the cake

    Spread the batter evenly in the prepared tin. Arrange apple slices neatly on top, pressing them slightly into the batter. Scatter flaked almonds over the apples.

    Step 6: Bake until golden

    Bake for 40–45 minutes until golden brown and a skewer comes out clean. Cover with foil halfway if browning too quickly.

    Step 7: Cool and serve

    Allow to cool in the tin for 10 minutes, then transfer to a wire rack. Dust with icing sugar before serving.

    Mary Berry Apple and Almond Cake

    What I Got Wrong (And How I Fixed It)

    • Apples released too much liquid – Using firm eating apples helped prevent sogginess.
    • Cake browned too quickly – Covering loosely with foil halfway ensured even baking.
    • Overmixed batter – Gave a dense texture; folding gently kept the cake light.

    Healthier Ways to Make Mary Berry Apple and Almond Cake

    • Swap caster sugar for coconut sugar or honey.
    • Use wholemeal flour for added fibre.
    • Reduce butter slightly and replace it with Greek yogurt.
    • Add extra apple slices for natural sweetness.

    Ingredient Substitutions for Mary Berry Apple and Almond Cake

    • Apples → Use pears or peaches for variation.
    • Ground almonds → Swap with hazelnut or walnut meal.
    • Self-raising flour → Replace with plain flour plus 1 tsp baking powder.
    • Butter → Use sunflower oil or dairy-free spread for a lighter option.

    Pairing Ideas: What to Serve With Apple and Almond Cake

    • Pouring cream – Classic accompaniment for warm cake.
    • Vanilla ice cream – Adds a cold, creamy contrast.
    • Warm custard – Comforting and rich.
    • Berry compote – Balances the sweetness with tart flavours.
    • Coffee or tea – Perfect for an afternoon tea setting.

    Expert Tips for Apple and Almond Cake Success

    • Choose firm apples – They hold their shape while baking.
    • Layer apples neatly – Ensures even coverage and a pretty finish.
    • Toast flaked almonds lightly – Brings out their nutty flavour.
    • Don’t overmix batter – Keeps the sponge light and airy.
    • Test with a skewer – Check the centre is cooked through before removing.
    • Dust before serving – A little icing sugar adds elegance.

    Creative Ways to Customize Apple and Almond Cake

    • Add a spoonful of cinnamon or nutmeg to the batter for warmth.
    • Stir in sultanas or dried cranberries for extra sweetness.
    • Drizzle with a lemon glaze instead of icing sugar.
    • Use a mix of red and green apples for colour contrast.
    • Add a layer of apricot jam under the apples for richness.

    Storing Apple and Almond Cake the Right Way

    • Store in an airtight container at room temperature for up to 3 days.
    • Refrigerate if serving with cream to keep fresh longer.
    • Freeze individual slices wrapped well for up to 1 month.

    How to Reheat Apple and Almond Cake

    • Oven method – Warm at 160°C for 10 minutes.
    • Microwave method – Heat individual slices for 20–30 seconds.
    • From frozen – Defrost overnight, then reheat gently before serving.

    Nutritional Breakdown (per serving)

    • Calories: ~365 kcal
    • Protein: 6g
    • Carbohydrates: 38g
    • Fat: 20g
    • Fibre: 3g
    • Sugar: 22g

    FAQs

    How do you stop apple and almond cake from being too soggy?

    To prevent sogginess, use firm apples that hold their shape and avoid releasing too much liquid. Cooling the cooked fruit slightly before layering also helps maintain a moist but not wet texture.

    Can I use ground almonds instead of flour in apple and almond cake?

    No, ground almonds should not fully replace flour, as they don’t provide enough structure on their own. A combination of self-raising flour and ground almonds keeps the cake moist but still stable.

    Should apples be cooked before adding to almond cake?

    Apples don’t need pre-cooking for this cake. Thinly sliced raw apples soften while baking, blending into the sponge and keeping it moist without extra preparation.

    How do you know when an apple and almond cake is fully baked?

    The cake is ready when the top is golden and a skewer inserted into the centre comes out clean. If it browns too quickly, cover with foil for the last 10 minutes of baking.

    Wrapping It Up

    Mary Berry’s Apple and Almond Cake is the kind of bake that proves simplicity can be delicious. With its moist almond sponge, sweet apples, and golden topping, it’s a cake you’ll want to make again and again. Perfect for teatime, celebrations, or just when you crave a homemade dessert, this cake brings comfort and elegance in every slice.

    Print

    Mary Berry Apple and Almond Cake Recipe

    Mary Berry’s Apple and Almond Cake is a classic British bake made with a simple sponge base enriched with ground almonds, topped with slices of apple and a scattering of flaked almonds. As it bakes, the apples soften into the sponge, keeping it moist, while the almonds on top become lightly toasted, adding texture and flavour. It’s a timeless cake that highlights the beauty of seasonal fruit in a homely yet elegant way.

    • Author: Ekani Ella
    • Prep Time: 20
    • Cook Time: 45
    • Total Time: 1 hour 5 minutes
    • Yield: 8 1x
    • Category: Dessert
    • Method: Baking
    • Cuisine: British

    Ingredients

    Scale
    • 150g butter, softened

    • 150g caster sugar

    • 2 large eggs

    • 100g self-raising flour

    • 1 tsp baking powder

    • 100g ground almonds

    • 2 medium apples, peeled, cored, and thinly sliced

    • 50g flaked almonds

    • 1 tsp vanilla extract

    • 2 tbsp milk

    • Icing sugar, for dusting

    Instructions

    Step 1: Mix wine and lemon juice

    In a bowl, combine lemon juice, zest, and wine. Let it sit for 5 minutes to allow flavours to blend.

    Step 2: Whip the cream

    Pour double cream and caster sugar into a large bowl. Whisk until the cream holds soft peaks.

    Step 3: Combine cream with lemon mixture

    Gradually fold the lemon and wine mixture into the whipped cream until smooth and slightly thickened.

    Step 4: Chill and serve

    Spoon into serving glasses, chill in the fridge for at least 1 hour, then garnish with lemon slices or mint before serving.

    Did you make this recipe?

    Share a photo and tag us — we can’t wait to see what you’ve made!

  • Mary Berry Malteser Cake Recipe

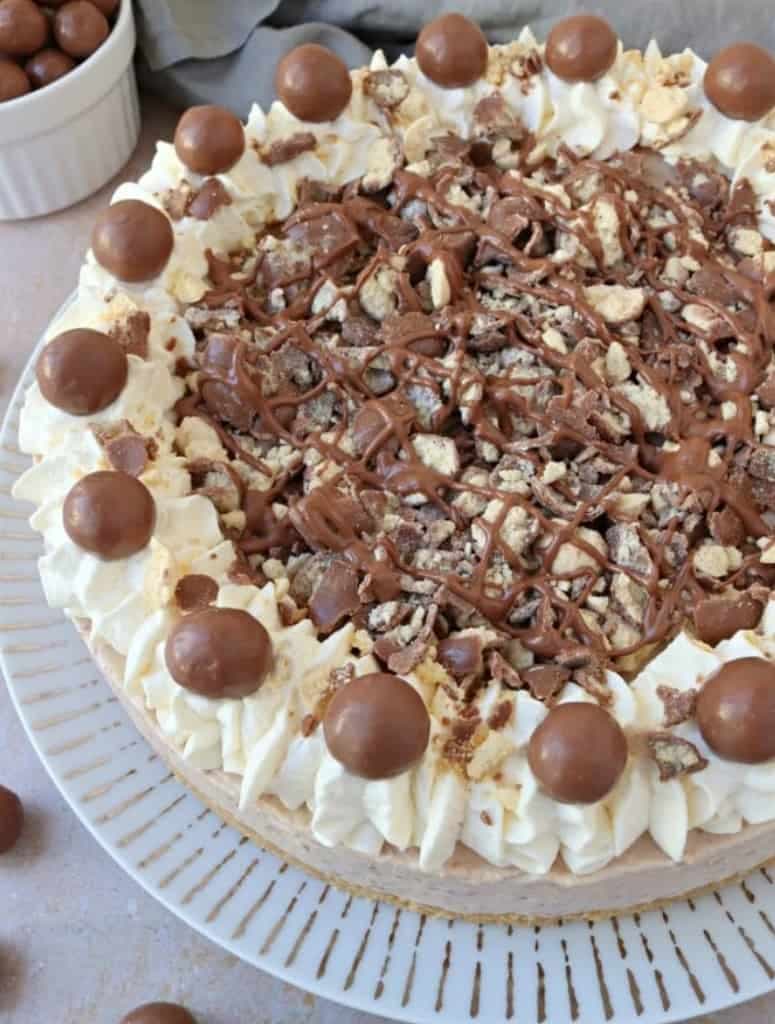
    Mary Berry Malteser Cake Recipe

    Mary Berry’s Malteser Cake is a true crowd-pleaser that combines light chocolate sponge layers with a creamy malted filling and a crunchy Malteser topping. This cake is indulgent, fun, and perfect for birthdays, family gatherings, or weekend treats. With its rich chocolate flavour and delightful crunch, it’s a dessert that appeals to both kids and adults. The best part? It’s surprisingly simple to prepare while still looking impressive when served.

    What is Mary Berry Malteser Cake?

    Mary Berry’s Malteser Cake is a chocolate sponge cake infused with malt powder and sandwiched together with a light buttercream frosting. The star of the show is the topping of crushed and whole Maltesers, which adds both crunch and extra chocolatey sweetness. It’s a playful twist on a classic chocolate cake and a guaranteed hit for celebrations.

    Mary Berry Malteser Cake recipe

    Try Other Mary Berry Recipes

    Why This Recipe is Worth Trying

    • Fun and nostalgic – Brings back childhood memories with Maltesers.
    • Perfect for parties – A showstopper dessert that looks beautiful on the table.
    • Light but indulgent – Soft sponge with crunchy topping.
    • Easy to prepare – No complicated techniques required.
    • Customisable – Can be decorated in different creative ways.

    Essential Ingredients to Make Mary Berry Malteser Cake

    • 175g self-raising flour
    • 1 tsp baking powder
    • 175g caster sugar
    • 175g butter, softened
    • 3 large eggs
    • 2 tbsp cocoa powder
    • 2 tbsp malted milk powder (like Horlicks)
    • 2 tbsp milk

    For the buttercream filling and topping:

    • 100g butter, softened
    • 200g icing sugar
    • 2 tbsp cocoa powder
    • 1 tbsp malted milk powder
    • 2 tbsp milk
    • 100g Maltesers (whole and crushed, for decoration)

    Handy Kitchen Tools for Best Results

    • Two 20cm round cake tins
    • Mixing bowls
    • Electric whisk or stand mixer
    • Spatula
    • Cooling rack
    • Offset spatula or palette knife

    Step-by-Step Guide to Making Mary Berry Malteser Cake

    Step 1: Prepare the tins

    Preheat the oven to 180°C (160°C fan). Grease and line two 20cm round cake tins with baking paper.

    Step 2: Make the sponge batter

    In a large bowl, cream butter and sugar until pale and fluffy. Beat in the eggs one at a time, then sift in flour, baking powder, cocoa, and malt powder. Add milk and mix until smooth.

    Step 3: Bake the sponges

    Divide the batter evenly between the tins and smooth the tops. Bake for 20–25 minutes until risen and a skewer comes out clean. Cool in tins for 10 minutes, then transfer to a wire rack.

    Step 4: Prepare the buttercream

    Beat butter until creamy, then gradually add icing sugar, cocoa powder, and malt powder. Mix in milk until smooth and fluffy.

    Step 5: Assemble the cake

    Spread half the buttercream over one sponge layer, place the second sponge on top, and cover the cake with the remaining buttercream.

    Step 6: Decorate with Maltesers

    Top with whole and crushed Maltesers for a crunchy finish. Arrange creatively for the best presentation.

    Mary Berry Malteser Cake

    What I Got Wrong (And How I Fixed It)

    • Overmixed batter – Made the cake dense. Folding gently kept the sponge light.
    • Added Maltesers inside the sponge – They melted and disappeared. Best to use them as a topping.
    • Didn’t chill buttercream – Made spreading messy. Cooling it slightly made it easier.

    Healthier Ways to Make Mary Berry Malteser Cake

    • Reduce sugar slightly for a less sweet sponge.
    • Use low-fat cocoa powder for a lighter flavour.
    • Swap buttercream with whipped cream for a lighter filling.
    • Add fresh fruit slices between layers for balance.

    Ingredient Substitutions for Mary Berry Malteser Cake

    • Malted milk powder → Skip or replace with hot chocolate powder.
    • Self-raising flour → Plain flour plus 1 tsp baking powder.
    • Butter → Dairy-free spread for a vegan version.
    • Maltesers → Crunchie pieces or Aero Bubbles for variation.

    Pairing Ideas: What to Serve With Malteser Cake

    • Fresh strawberries – Add colour and freshness.
    • Vanilla ice cream – A cooling contrast to the chocolate richness.
    • Cappuccino or latte – Complements the malt flavour perfectly.
    • Chocolate sauce drizzle – For an extra indulgent touch.
    • Light fruit salad – Balances the sweetness.

    Expert Tips for Malteser Cake Success

    • Cream butter and sugar well – Gives the sponge its light texture.
    • Weigh ingredients accurately – Keeps cakes even and balanced.
    • Cool cakes fully before icing – Prevents buttercream from melting.
    • Decorate just before serving – Keeps Maltesers crisp.
    • Double up recipe – For a larger celebration cake.
    • Use a palette knife – Ensures smooth buttercream coverage.

    Creative Ways to Customize Malteser Cake

    • Add a layer of Nutella between the sponges.
    • Decorate with chocolate curls alongside Maltesers.
    • Make it a tiered cake for birthdays.
    • Add a salted caramel drizzle for contrast.
    • Create a Malteser dome effect by piling them high on top.

    Storing Malteser Cake the Right Way

    • Store in an airtight container at room temperature for 2–3 days.
    • Refrigerate if very warm, but bring to room temperature before serving.
    • Freeze sponge layers (without buttercream) for up to 1 month.

    How to Reheat Malteser Cake

    This cake is not usually reheated. If serving slightly warm, microwave individual slices for 10–15 seconds, but avoid heating the decorated cake as Maltesers can melt.

    Nutritional Breakdown (per serving)

    • Calories: ~420 kcal
    • Protein: 6g
    • Carbohydrates: 52g
    • Fat: 21g
    • Fibre: 2g
    • Sugar: 34g

    FAQs

    How do you stop Maltesers from melting on a cake?

    To stop Maltesers from melting, decorate the cake only after it has completely cooled and just before serving. Storing the cake in a cool place rather than the fridge also helps keep them crisp.

    Can Malteser cake be made in advance?

    Yes, Malteser cake sponges can be baked a day ahead and stored in an airtight container. Add the buttercream and Malteser decoration on the day of serving for the best texture.

    Why did my chocolate sponge turn dense instead of light?

    A dense sponge usually means the batter was overmixed or the butter and sugar were not creamed enough. Mixing gently and beating butter and sugar until pale and fluffy ensures a lighter sponge.

    Can I use drinking chocolate instead of malted milk powder?

    Yes, drinking chocolate can be used instead of malted milk powder, but it will give a sweeter, less malty flavour. For the classic taste, malted milk powder like Horlicks works best.

    Wrapping It Up

    Mary Berry’s Malteser Cake is a fun, nostalgic bake that brings together soft chocolate sponge, creamy malted buttercream, and the crunch of Maltesers in every bite. Simple to make yet impressive to serve, it’s the perfect cake for birthdays, gatherings, or anytime you want to treat your family to something special.

    Print

    Mary Berry Malteser Cake Recipe

    Mary Berry’s Malteser Cake is a chocolate sponge cake infused with malt powder and sandwiched together with a light buttercream frosting. The star of the show is the topping of crushed and whole Maltesers, which adds both crunch and extra chocolatey sweetness. It’s a playful twist on a classic chocolate cake and a guaranteed hit for celebrations.

    • Author: Ekani Ella
    • Prep Time: 25
    • Cook Time: 25
    • Total Time: 50 minutes
    • Yield: 8 1x
    • Category: Dessert
    • Method: Baking
    • Cuisine: British

    Ingredients

    Scale
    • 175g self-raising flour

    • 1 tsp baking powder

    • 175g caster sugar

    • 175g butter, softened

    • 3 large eggs

    • 2 tbsp cocoa powder

    • 2 tbsp malted milk powder (like Horlicks)

    • 2 tbsp milk

    For the buttercream filling and topping:

    • 100g butter, softened

    • 200g icing sugar

    • 2 tbsp cocoa powder

    • 1 tbsp malted milk powder

    • 2 tbsp milk

    • 100g Maltesers (whole and crushed, for decoration)

    Instructions

    Step 1: Prepare the tins

    Preheat the oven to 180°C (160°C fan). Grease and line two 20cm round cake tins with baking paper.

    Step 2: Make the sponge batter

    In a large bowl, cream butter and sugar until pale and fluffy. Beat in the eggs one at a time, then sift in flour, baking powder, cocoa, and malt powder. Add milk and mix until smooth.

    Step 3: Bake the sponges

    Divide the batter evenly between the tins and smooth the tops. Bake for 20–25 minutes until risen and a skewer comes out clean. Cool in tins for 10 minutes, then transfer to a wire rack.

    Step 4: Prepare the buttercream

    Beat butter until creamy, then gradually add icing sugar, cocoa powder, and malt powder. Mix in milk until smooth and fluffy.

    Step 5: Assemble the cake

    Spread half the buttercream over one sponge layer, place the second sponge on top, and cover the cake with the remaining buttercream.

    Step 6: Decorate with Maltesers

    Top with whole and crushed Maltesers for a crunchy finish. Arrange creatively for the best presentation.

    Did you make this recipe?

    Share a photo and tag us — we can’t wait to see what you’ve made!

  • Mary Berry Salmon and Pea Risotto Recipe

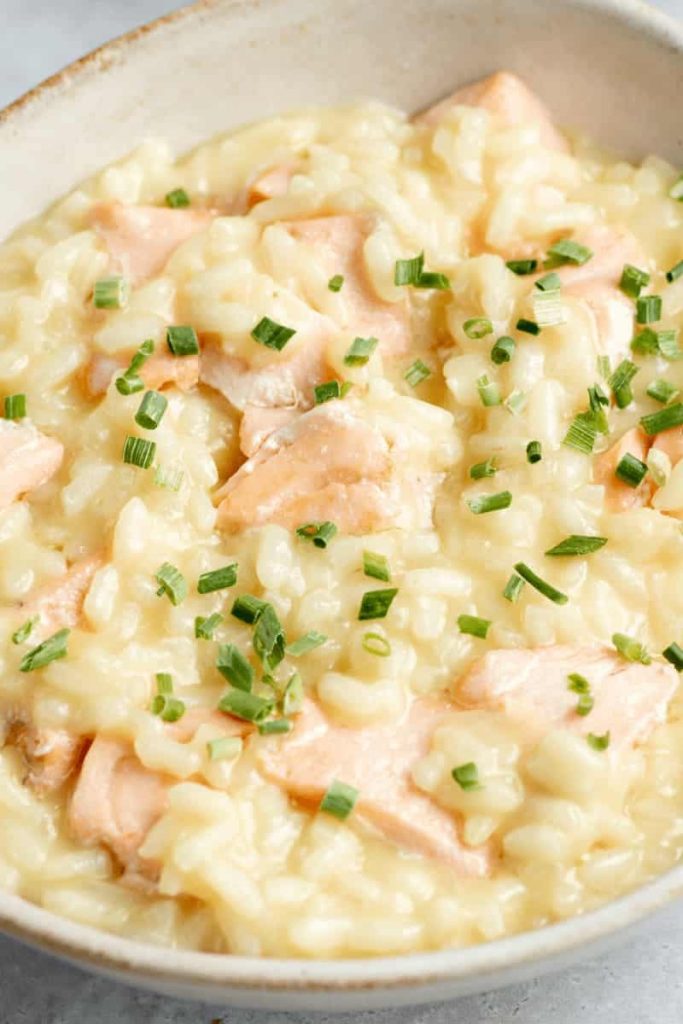
    Mary Berry Salmon and Pea Risotto Recipe

    Mary Berry’s Salmon and Pea Risotto is a creamy, comforting dish that beautifully balances the richness of salmon with the sweetness of peas. This recipe transforms simple ingredients into a satisfying meal that feels elegant yet approachable. With its silky texture and delicate flavour, it’s perfect for weeknight dinners, small gatherings, or even as a dinner-party main.

    It takes under an hour to prepare and is cooked using the classic stovetop method, ensuring a creamy risotto with tender flakes of salmon in every bite.

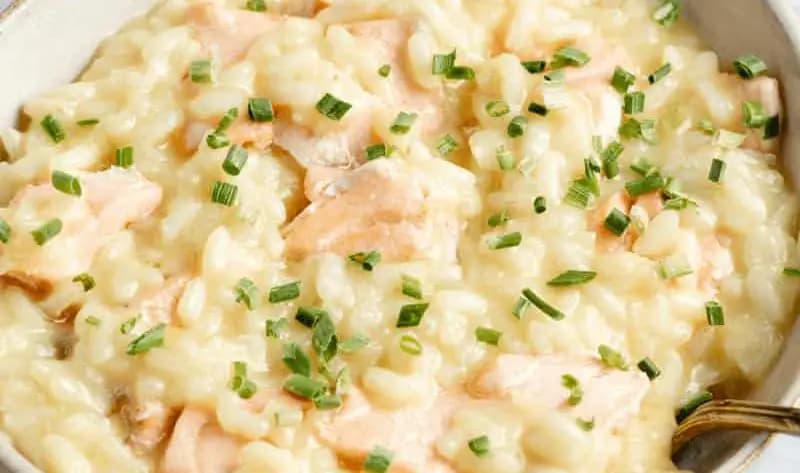
    Mary Berry Salmon and Pea Risotto

    Try Other Mary Berry Recipes

    What is Mary Berry Salmon and Pea Risotto?

    Mary Berry’s Salmon and Pea Risotto is a traditional Italian-style risotto made with Arborio rice, gently cooked with stock until creamy, then finished with fresh peas, flaked salmon, and parmesan cheese. The dish combines protein, vegetables, and grains into a wholesome one-pot meal. It’s both nourishing and luxurious without being complicated, which is why it has become a favourite for many home cooks.

    Why This Recipe is Worth Trying

    • Balanced flavours – The richness of salmon pairs beautifully with the light sweetness of peas.
    • One-pan meal – Everything is cooked in one pan, reducing washing up.
    • Comforting yet elegant – Suitable for both family dinners and special occasions.
    • Nutritious – Packed with protein, omega-3s, and fibre-rich vegetables.
    • Customisable – Easy to adapt with extra vegetables or herbs.

    Essential Ingredients to Make Mary Berry Salmon and Pea Risotto

    • 250g Arborio rice
    • 400g salmon fillets, skin removed
    • 1 onion, finely chopped
    • 2 garlic cloves, minced
    • 150g peas (fresh or frozen)
    • 1L hot vegetable or fish stock
    • 50g butter
    • 2 tbsp olive oil
    • 100ml dry white wine (optional)
    • 50g parmesan cheese, grated
    • 2 tbsp fresh parsley, chopped
    • Salt and black pepper, to taste

    Handy Kitchen Tools for Best Results

    • Heavy-based saucepan or wide frying pan
    • Wooden spoon for stirring
    • Ladle for adding stock gradually
    • Sharp knife and chopping board
    • Cheese grater

    Step-by-Step Guide to Making Mary Berry Salmon and Pea Risotto

    Step 1: Prepare the stock

    Keep your stock hot in a saucepan on low heat. Warm stock helps rice cook evenly without interrupting the simmer.

    Step 2: Cook the salmon

    Season salmon fillets lightly and pan-fry for 3–4 minutes each side until just cooked. Flake into large chunks and set aside.

    Step 3: Sauté onion and garlic

    In a large pan, heat butter and olive oil, add chopped onion and garlic, and cook until soft and fragrant.

    Step 4: Toast the rice

    Stir in Arborio rice and cook for 1–2 minutes until lightly coated and translucent around the edges.

    Step 5: Deglaze with wine

    Pour in the wine and let it reduce until absorbed (optional step for deeper flavour).

    Step 6: Add stock gradually

    Using a ladle, add hot stock one spoonful at a time, stirring frequently. Allow each addition to be absorbed before adding more. Continue for about 18–20 minutes until rice is creamy and tender but slightly al dente.

    Step 7: Stir in peas and salmon

    Add peas and gently fold in the flaked salmon. Heat through for 2–3 minutes.

    Step 8: Finish with parmesan and parsley

    Stir in parmesan cheese and parsley, adjust seasoning, and serve immediately while creamy.

    Mary Berry Salmon and Pea Risotto

    What I Got Wrong (And How I Fixed It)

    • Added all stock at once – Risotto turned soupy. Fixed by adding stock slowly with stirring.
    • Overcooked salmon – Made it dry. Now I cook salmon gently and add it at the end.
    • Didn’t stir enough – Stirring regularly helps release starch, making risotto creamy.

    Healthier Ways to Make Mary Berry Salmon and Pea Risotto

    • Use brown rice instead of Arborio for extra fibre (though cooking time will increase).
    • Swap butter for olive oil to reduce saturated fat.
    • Reduce parmesan and add nutritional yeast for a lighter option.
    • Add extra vegetables such as courgettes or spinach.

    Ingredient Substitutions for Mary Berry Salmon and Pea Risotto

    • Salmon → Try smoked trout or cooked prawns.
    • Arborio rice → Carnaroli rice or even pearl barley for a nutty flavour.
    • Parmesan → Pecorino Romano or Grana Padano.
    • Peas → Use broad beans or edamame for variation.

    Pairing Ideas: What to Serve With Salmon and Pea Risotto

    • Crisp green salad – Adds freshness to balance the creamy risotto.
    • Garlic bread – Perfect for mopping up extra sauce.
    • Roasted asparagus – Complements the salmon beautifully.
    • Chilled white wine – A Sauvignon Blanc or Chardonnay works well.
    • Tomato bruschetta – A light starter before serving the risotto.

    Expert Tips for Salmon and Pea Risotto Success

    • Use hot stock only – Prevents temperature drops and uneven cooking.
    • Stir consistently – Releases starch for that signature creamy texture.
    • Don’t overcook salmon – Keep it moist and flake it in at the end.
    • Taste regularly – Adjust seasoning as you build layers of flavour.
    • Serve immediately – Risotto thickens as it sits, so enjoy straight from the pan.
    • Add lemon zest – Brightens the dish and balances the creaminess.

    Creative Ways to Customize Salmon and Pea Risotto

    • Stir in lemon juice for a refreshing twist.
    • Add a touch of saffron for colour and depth.
    • Mix in cream cheese or mascarpone for extra richness.
    • Sprinkle with toasted pine nuts for crunch.
    • Fold through fresh dill for a herby finish.

    Storing Salmon and Pea Risotto the Right Way

    • Refrigerate cooled risotto in an airtight container for up to 2 days.
    • Avoid freezing, as risotto loses its creamy texture when thawed.
    • Store salmon separately if possible to keep it fresh.

    How to Reheat Salmon and Pea Risotto

    • Stovetop method – Reheat gently with a splash of stock or water while stirring.
    • Microwave method – Heat in short bursts, stirring in between and adding liquid if needed.
    • Avoid oven reheating – Risotto can dry out easily in the oven.

    Nutritional Breakdown (per serving)

    • Calories: ~490 kcal
    • Protein: 34g
    • Carbohydrates: 52g
    • Fat: 14g
    • Fibre: 5g
    • Sodium: 560mg
    Print

    Mary Berry Salmon and Pea Risotto

    Mary Berry’s Salmon and Pea Risotto is a traditional Italian-style risotto made with Arborio rice, gently cooked with stock until creamy, then finished with fresh peas, flaked salmon, and parmesan cheese. The dish combines protein, vegetables, and grains into a wholesome one-pot meal. It’s both nourishing and luxurious without being complicated, which is why it has become a favourite for many home cooks.

    • Author: ekani
    • Prep Time: 15
    • Cook Time: 35
    • Total Time: 50 minutes
    • Yield: 4 1x
    • Category: Main Course
    • Method: Stovetop
    • Cuisine: Italian

    Ingredients

    Scale

    • 250g Arborio rice

    • 400g salmon fillets, skin removed

    • 1 onion, finely chopped

    • 2 garlic cloves, minced

    • 150g peas (fresh or frozen)

    • 1L hot vegetable or fish stock

    • 50g butter

    • 2 tbsp olive oil

    • 100ml dry white wine (optional)

    • 50g parmesan cheese, grated

    • 2 tbsp fresh parsley, chopped

    • Salt and black pepper, to taste

    Instructions

    Step 1: Prepare the stock

    Keep your stock hot in a saucepan on low heat. Warm stock helps rice cook evenly without interrupting the simmer.

    Step 2: Cook the salmon

    Season salmon fillets lightly and pan-fry for 3–4 minutes each side until just cooked. Flake into large chunks and set aside.

    Step 3: Sauté onion and garlic

    In a large pan, heat butter and olive oil, add chopped onion and garlic, and cook until soft and fragrant.

    Step 4: Toast the rice

    Stir in Arborio rice and cook for 1–2 minutes until lightly coated and translucent around the edges.

    Step 5: Deglaze with wine

    Pour in the wine and let it reduce until absorbed (optional step for deeper flavour).

    Step 6: Add stock gradually

    Using a ladle, add hot stock one spoonful at a time, stirring frequently. Allow each addition to be absorbed before adding more. Continue for about 18–20 minutes until rice is creamy and tender but slightly al dente.

    Step 7: Stir in peas and salmon

    Add peas and gently fold in the flaked salmon. Heat through for 2–3 minutes.

    Step 8: Finish with parmesan and parsley

    Stir in parmesan cheese and parsley, adjust seasoning, and serve immediately while creamy.

    Did you make this recipe?

    Share a photo and tag us — we can’t wait to see what you’ve made!

    FAQs

    Do you cook salmon before adding it to risotto?

    Yes, the salmon should be lightly cooked before adding it to risotto. Pan-fry or poach it for a few minutes until just done, then flake it in at the end of cooking so it stays moist and tender.

    Can I make salmon and pea risotto without wine?

    Yes, you can make salmon and pea risotto without wine. Simply skip the wine step and replace it with extra hot stock. The risotto will still be creamy and full of flavour.

    How do you stop risotto from becoming too dry?

    To keep risotto from drying out, add hot stock gradually and stir often. The rice should absorb the liquid slowly, creating a creamy texture. If it thickens too much, add a splash of extra stock before serving.

    Should peas be added early or late in risotto?

    Peas are best added towards the end of cooking risotto. Adding them in the last few minutes keeps their colour bright and their texture tender but not mushy.

    Wrapping It Up

    Mary Berry’s Salmon and Pea Risotto is a dish that proves you don’t need complicated steps to enjoy restaurant-quality food at home. With creamy rice, flaky salmon, and fresh peas, it strikes the perfect balance of flavour and texture.

  • Mary Berry Lemon Syllabub

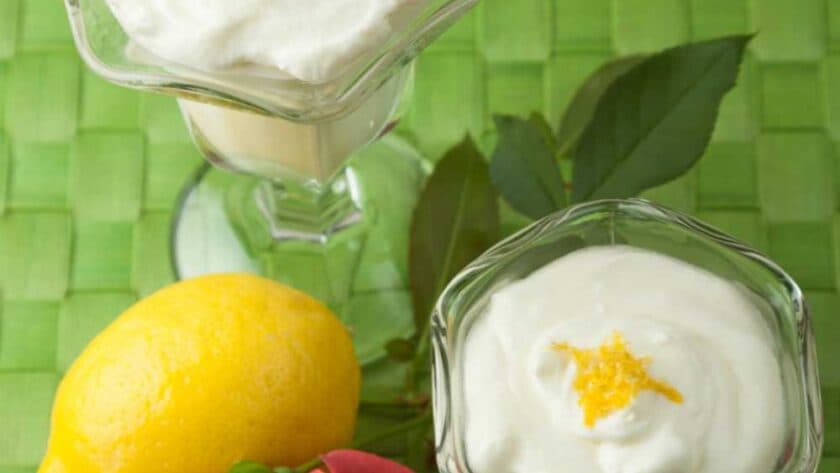
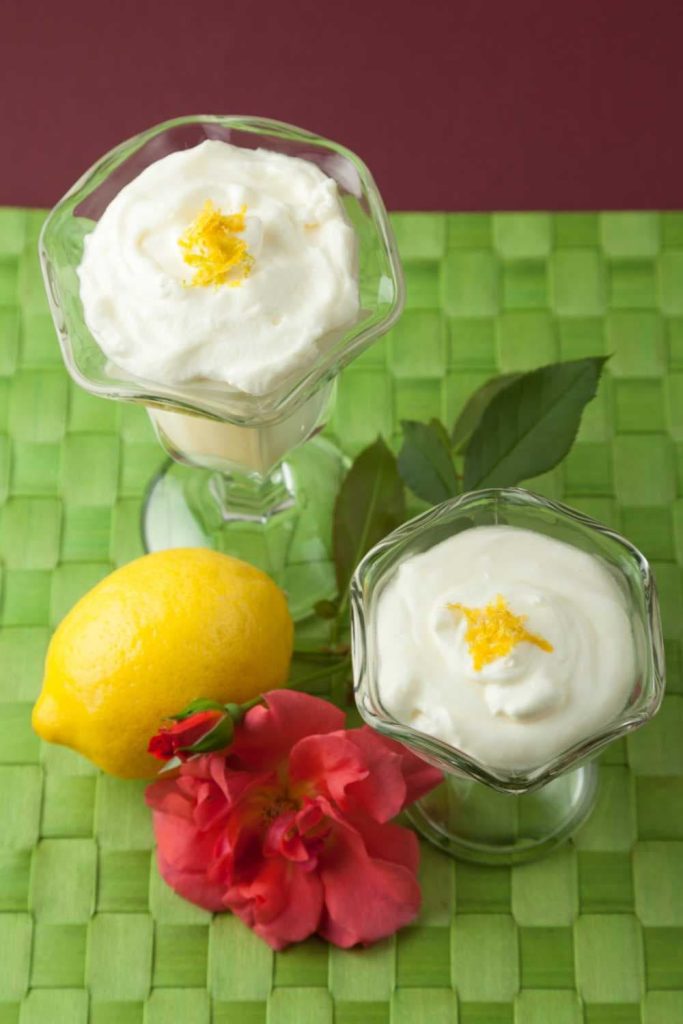
    Mary Berry Lemon Syllabub

    Mary Berry’s Lemon Syllabub is a light, creamy dessert with a refreshing citrus kick, perfect for ending a meal on a bright note. This classic British pudding combines whipped cream, lemon juice, zest, sugar, and a splash of sweet wine to create a smooth, airy treat that feels both indulgent and refreshing. Best of all, it requires no baking and can be prepared in advance, making it ideal for dinner parties, afternoon tea, or festive gatherings.

    Mary Berry Lemon Syllabub

    Try Other Mary Berry Recipes

    What is Mary Berry Lemon Syllabub?

    Mary Berry Lemon Syllabub is a traditional English dessert made by whipping cream with sugar, lemon juice, and zest, often with the addition of white wine or sherry. The acidity of the lemon thickens the cream naturally, giving it a mousse-like texture. Served chilled in glasses, it’s a simple yet elegant dessert that has been enjoyed for centuries in British cuisine.

    Why This Recipe is Worth Trying

    • Quick and easy – Takes less than 20 minutes to prepare.
    • No baking needed – A perfect make-ahead dessert.
    • Elegant presentation – Looks beautiful when served in glasses with garnish.
    • Balanced flavours – Creamy richness offset by zesty lemon.
    • Versatile – Can be served alone or paired with biscuits or fruit.

    Essential Ingredients to Make Mary Berry Lemon Syllabub

    • 300ml double cream
    • 100g caster sugar
    • Juice and zest of 2 lemons
    • 150ml sweet white wine (or sherry)
    • Lemon slices or mint leaves, for garnish

    Handy Kitchen Tools for Best Results

    • Mixing bowls
    • Electric whisk or hand whisk
    • Zester and juicer
    • Measuring jug
    • Serving glasses or dessert bowls

    Step-by-Step Guide to Making Mary Berry Lemon Syllabub

    Step 1: Mix wine and lemon juice

    In a bowl, combine lemon juice, zest, and wine. Let it sit for 5 minutes to allow flavours to blend.

    Step 2: Whip the cream

    Pour double cream and caster sugar into a large bowl. Whisk until the cream holds soft peaks.

    Step 3: Combine cream with lemon mixture

    Gradually fold the lemon and wine mixture into the whipped cream until smooth and slightly thickened.

    Step 4: Chill and serve

    Spoon into serving glasses, chill in the fridge for at least 1 hour, then garnish with lemon slices or mint before serving.

    easy Mary Berry Lemon Syllabub recipe
    Mary Berry Lemon Syllabub

    What I Got Wrong (And How I Fixed It)

    • Overwhipped cream – Made the texture grainy. Whipping only to soft peaks gave the best result.
    • Added lemon too quickly – Caused curdling. Folding it in gradually kept it silky.
    • Too much sugar – Overpowered the lemon. Adjusting to taste created a better balance.

    Healthier Ways to Make Mary Berry Lemon Syllabub

    • Replace sugar with honey or a natural sweetener.
    • Use half cream and half Greek yogurt for a lighter texture.
    • Swap wine with sparkling water for an alcohol-free version.
    • Reduce sugar slightly and let lemon flavour shine through.

    Ingredient Substitutions for Mary Berry Lemon Syllabub

    • Double cream → Use whipping cream for a lighter consistency.
    • White wine → Replace with sherry or elderflower cordial.
    • Lemon → Try lime or orange for a citrus variation.
    • Sugar → Substitute with agave or coconut sugar.

    Pairing Ideas: What to Serve With Lemon Syllabub

    • Crisp shortbread biscuits – Perfect for dipping into the cream.
    • Fresh berries – Strawberries or raspberries add colour and tang.
    • Almond biscotti – Adds a crunchy texture alongside the creaminess.
    • Meringue nests – For a light pavlova-style pairing.
    • Prosecco – Complements the citrus and cream beautifully.

    Expert Tips for Lemon Syllabub Success

    • Use fresh lemon juice – Bottled juice won’t give the same brightness.
    • Whip cream gently – Stop as soon as soft peaks form to avoid graininess.
    • Chill before serving – Enhances the flavour and texture.
    • Adjust sugar – Taste before chilling to find the right balance.
    • Serve in clear glasses – Makes the dessert look elegant and inviting.
    • Add zest at the end – A sprinkle on top intensifies flavour and presentation.

    Creative Ways to Customize Lemon Syllabub

    • Add a hint of ginger with grated fresh ginger in the cream.
    • Infuse with lavender syrup for a floral touch.
    • Create a layered dessert with crushed biscuits at the bottom.
    • Mix in crushed meringues for extra texture.
    • Top with candied lemon peel for a decorative finish.

    Storing Lemon Syllabub the Right Way

    • Keep in the fridge, covered, for up to 2 days.
    • Do not freeze, as cream separates after thawing.
    • Store in individual glasses for easy serving and freshness.

    How to Reheat Lemon Syllabub (If Needed)

    This dessert is not reheated as it’s meant to be served chilled. If it separates slightly, whisk gently before serving.

    Nutritional Breakdown (per serving)

    • Calories: ~320 kcal
    • Protein: 2g
    • Carbohydrates: 22g
    • Fat: 24g
    • Fibre: 0.5g
    • Sugar: 20g
    Print

    Mary Berry Lemon Syllabub

    Mary Berry’s Lemon Syllabub is a light, creamy dessert with a refreshing citrus kick, perfect for ending a meal on a bright note. This classic British pudding combines whipped cream, lemon juice, zest, sugar, and a splash of sweet wine to create a smooth, airy treat that feels both indulgent and refreshing. Best of all, it requires no baking and can be prepared in advance, making it ideal for dinner parties, afternoon tea, or festive gatherings.

    • Author: ekani
    • Prep Time: 15
    • Total Time: 15 minutes
    • Yield: 4 1x
    • Category: Dessert
    • Method: No-bake
    • Cuisine: British

    Ingredients

    Scale
    • 300ml double cream

    • 100g caster sugar

    • Juice and zest of 2 lemons

    • 150ml sweet white wine (or sherry)

    • Lemon slices or mint leaves, for garnish

    Instructions

    Step 2: Whip the cream

    Pour double cream and caster sugar into a large bowl. Whisk until the cream holds soft peaks.

    Step 3: Combine cream with lemon mixture

    Gradually fold the lemon and wine mixture into the whipped cream until smooth and slightly thickened.

    Step 4: Chill and serve

    Spoon into serving glasses, chill in the fridge for at least 1 hour, then garnish with lemon slices or mint before serving.

    Did you make this recipe?

    Share a photo and tag us — we can’t wait to see what you’ve made!

    FAQs

    How do you stop lemon syllabub from curdling?

    To prevent lemon syllabub from curdling, add the lemon juice slowly into the whipped cream while folding gently. Overwhipping or adding lemon too quickly can split the cream.

    Can lemon syllabub be made without alcohol?

    Yes, lemon syllabub can be made alcohol-free by replacing wine with elderflower cordial, apple juice, or sparkling water. The texture remains creamy and the flavour stays refreshing.

    Why is my syllabub too runny?

    If your syllabub is runny, the cream was not whipped enough before adding the lemon mixture. Whip the cream to soft peaks first, then fold in the lemon juice and wine gradually.

    How long does lemon syllabub need to chill before serving?

    Lemon syllabub should chill for at least 1 hour before serving. This allows the cream to set slightly and the flavours to develop fully.

    Wrapping It Up

    Mary Berry’s Lemon Syllabub is a classic British dessert that proves simplicity can be elegant. With its creamy texture and zesty lemon flavour, it’s a dish that works equally well for casual meals or special occasions. Easy to prepare, visually appealing, and refreshing to taste, this syllabub is bound to become one of your go-to desserts for entertaining or a quick sweet treat.

  • Mary Berry Salmon Pasta Bake

    Mary Berry Salmon Pasta Bake

    Mary Berry’s Salmon Pasta Bake is the perfect family-friendly comfort dish that brings together creamy pasta, flaky salmon, and a golden cheesy topping. With a delicious balance of rich flavours and satisfying textures, it’s an ideal recipe for weeknight dinners, gatherings, or even as a hearty weekend treat.

    What makes this dish stand out is its ability to feel indulgent while being simple to prepare, taking about an hour from start to finish. Baked to perfection, this recipe combines classic British homestyle cooking with a modern twist.

    Mary Berry Salmon Pasta Bake

    Try Other Mary Berry Recipes

    What is Mary Berry Salmon Pasta Bake?

    Mary Berry’s Salmon Pasta Bake is a creamy baked pasta dish layered with salmon, vegetables, pasta, and a velvety white sauce, all finished with a crispy cheese topping. It’s a wholesome, filling meal that requires minimal effort yet delivers maximum comfort. This bake is versatile, allowing for ingredient swaps and additions, making it suitable for families and anyone who enjoys simple but flavourful meals.

    Why This Recipe is Worth Trying

    • Perfect for family meals – A single dish that serves everyone at the table.
    • Rich yet balanced flavours – Creamy sauce paired with tender salmon.
    • Simple ingredients – Everything is easy to source from your local shop.
    • Make-ahead friendly – Can be prepped earlier and baked when needed.
    • Crowd-pleaser – Loved by both kids and adults.

    Essential Ingredients to Make Mary Berry Salmon Pasta Bake

    • 300g pasta (penne or fusilli work best)
    • 400g salmon fillets, skin removed
    • 1 onion, finely chopped
    • 2 garlic cloves, minced
    • 200g spinach or peas
    • 40g butter
    • 40g plain flour
    • 500ml milk
    • 100ml double cream
    • 150g cheddar cheese, grated
    • 50g parmesan cheese, grated
    • Salt and black pepper, to taste
    • Fresh parsley, for garnish

    Handy Kitchen Tools for Best Results

    • Large saucepan for boiling pasta
    • Baking dish (ceramic or glass)
    • Non-stick frying pan
    • Whisk for smooth sauce
    • Cheese grater
    • Sharp knife and chopping board

    Step-by-Step Guide to Making Mary Berry Salmon Pasta Bake

    • Step 1: Cook the pasta – Bring salted water to a boil, add pasta, and cook until just al dente. Drain and set aside.
    • Step 2: Prepare the salmon – Lightly season salmon fillets with salt and pepper, pan-fry for 3–4 minutes each side until just cooked, then flake into chunks.
    • Step 3: Sauté aromatics – In a pan, melt butter, add onions and garlic, and cook until soft and fragrant.
    • Step 4: Make the white sauce – Stir in flour to create a roux, then slowly whisk in milk until smooth. Add cream, simmer until thickened, and season well.
    • Step 5: Combine pasta and vegetables – Stir the pasta and spinach/peas into the sauce, coating everything evenly.
    • Step 6: Assemble the bake – Transfer to a baking dish, scatter salmon chunks, and mix lightly. Top with cheddar and parmesan cheese.
    • Step 7: Bake until golden – Place in a preheated oven at 200°C (180°C fan) for 20–25 minutes until bubbling and golden on top.
    Mary Berry Salmon Pasta Bake

    What I Got Wrong (And How I Fixed It)

    • Used overcooked pasta – Keeping pasta slightly undercooked helps avoid a mushy texture.
    • Didn’t season the sauce enough – Adding salt and pepper gradually gave better balance.
    • Skipped the cheese topping once – Without it, the bake lacked that signature golden crust.

    Healthier Ways to Make Mary Berry Salmon Pasta Bake

    • Swap cream with Greek yogurt for a lighter sauce.
    • Use wholewheat pasta to boost fibre.
    • Reduce cheese and top with breadcrumbs for a lighter crunch.
    • Add more vegetables like broccoli, courgettes, or mushrooms.

    Ingredient Substitutions for Mary Berry Salmon Pasta Bake

    • Salmon → Try smoked haddock or cooked chicken.
    • Cheddar cheese → Use mozzarella for a milder taste.
    • Spinach → Replace with kale or mixed vegetables.
    • Milk → Almond or oat milk for a dairy-free option.

    Pairing Ideas: What to Serve With Mary Berry Salmon Pasta Bake

    • Fresh green salad – Light and crisp to balance the creamy pasta.
    • Garlic bread slices – Ideal for soaking up extra sauce.
    • Roasted vegetables – Carrots, courgettes, or asparagus pair beautifully.
    • Chilled white wine – A crisp Sauvignon Blanc or Pinot Grigio.
    • Simple tomato soup – A warm, comforting starter.

    Expert Tips for Mary Berry Salmon Pasta Bake Success

    • Keep pasta slightly undercooked – It finishes cooking in the oven.
    • Flake salmon gently – Prevents it from breaking into tiny pieces.
    • Whisk sauce continuously – Ensures lump-free creaminess.
    • Layer cheese wisely – Mix some into the pasta and reserve plenty for topping.
    • Let it rest before serving – This helps the bake hold together.
    • Use a wide baking dish – Encourages even browning and a crispier crust.

    Creative Ways to Customize Mary Berry Salmon Pasta Bake

    • Add a spicy twist with chili flakes in the sauce.
    • Mix in sun-dried tomatoes for a tangy bite.
    • Swap cheddar with Gruyère or Red Leicester for different flavours.
    • Sprinkle a herb crust with breadcrumbs and parsley.
    • Stir in prawns or crab meat for a seafood medley.

    Storing Mary Berry Salmon Pasta Bake the Right Way

    • Cool completely before storing to prevent condensation.
    • Refrigerate in an airtight container for up to 3 days.
    • Freeze portions for up to 2 months for easy meal prep.
    • Cover with foil before freezing to avoid freezer burn.

    How to Reheat Mary Berry Salmon Pasta Bake

    • Stovetop method – Heat gently in a covered pan with a splash of milk.
    • Microwave method – Reheat individual portions, stirring halfway through.
    • From frozen – Thaw overnight in the fridge, then bake at 180°C until hot.

    Nutritional Breakdown (per serving)

    • Calories: ~520 kcal
    • Protein: 32g
    • Carbohydrates: 48g
    • Fat: 22g
    • Fibre: 4g
    • Sodium: 640mg
    Print

    Mary Berry Salmon Pasta Bake

    Mary Berry’s Salmon Pasta Bake is a creamy baked pasta dish layered with salmon, vegetables, pasta, and a velvety white sauce, all finished with a crispy cheese topping. It’s a wholesome, filling meal that requires minimal effort yet delivers maximum comfort. This bake is versatile, allowing for ingredient swaps and additions, making it suitable for families and anyone who enjoys simple but flavourful meals.

    • Author: Ekani Ella
    • Prep Time: 20
    • Cook Time: 40
    • Total Time: 1 hour
    • Yield: 4 1x
    • Category: Main Course
    • Method: Baking
    • Cuisine: British

    Ingredients

    Scale
    • 300g pasta (penne or fusilli work best)

    • 400g salmon fillets, skin removed

    • 1 onion, finely chopped

    • 2 garlic cloves, minced

    • 200g spinach or peas

    • 40g butter

    • 40g plain flour

    • 500ml milk

    • 100ml double cream

    • 150g cheddar cheese, grated

    • 50g parmesan cheese, grated

    • Salt and black pepper, to taste

    • Fresh parsley, for garnish

    Instructions

    • Step 1: Cook the pasta – Bring salted water to a boil, add pasta, and cook until just al dente. Drain and set aside.

    • Step 2: Prepare the salmon – Lightly season salmon fillets with salt and pepper, pan-fry for 3–4 minutes each side until just cooked, then flake into chunks.

    • Step 3: Sauté aromatics – In a pan, melt butter, add onions and garlic, and cook until soft and fragrant.

    • Step 4: Make the white sauce – Stir in flour to create a roux, then slowly whisk in milk until smooth. Add cream, simmer until thickened, and season well.

    • Step 5: Combine pasta and vegetables – Stir the pasta and spinach/peas into the sauce, coating everything evenly.

    • Step 6: Assemble the bake – Transfer to a baking dish, scatter salmon chunks, and mix lightly. Top with cheddar and parmesan cheese.

    • Step 7: Bake until golden – Place in a preheated oven at 200°C (180°C fan) for 20–25 minutes until bubbling and golden on top.

    Did you make this recipe?

    Share a photo and tag us — we can’t wait to see what you’ve made!

    FAQs

    How do you keep salmon moist in a pasta bake?

    To keep salmon moist in a pasta bake, cook it only partially before baking and avoid overcooking. Adding it in large flakes into the creamy sauce helps it stay tender and juicy while the oven finishes the cooking process.

    Can I use canned salmon instead of fresh for a salmon pasta bake?

    Yes, canned salmon works well in a pasta bake. Drain it thoroughly, remove any bones, and mix it into the sauce with the pasta before baking. It saves time and still gives a rich flavour.

    Should I cook the pasta fully before baking?

    No, pasta should be cooked until just al dente before baking. This prevents it from turning too soft, as it will continue to cook while the dish is in the oven.

    How do you stop a pasta bake from drying out?

    To prevent dryness, make sure the sauce is slightly runny before baking, as the pasta absorbs liquid during cooking. Covering the dish with foil for the first half of baking also helps retain moisture.

    Wrapping It Up

    Mary Berry’s Salmon Pasta Bake is proof that comfort food doesn’t have to be complicated. With its creamy sauce, tender salmon, and cheesy crust, it’s a recipe that delivers both ease and flavour. Perfect for busy families or special occasions, this dish can be adapted, lightened, or customized to suit your taste. Once you try it, it’s bound to become a regular in your meal rotation.